
How Do Professionals Use LED Strips for Architectural Lighting?
You see a stunning building at night, its features perfectly highlighted. You see a minimalist interior where the light seems to emerge from the walls themselves. It looks expensive and complex. How can you achieve these same high-end architectural effects?
Professional architectural lighting with LED strips is achieved by making the light source itself invisible. The focus is on the effect of the light—how it grazes a surface, defines a line, or creates a soft glow—to enhance the architecture, not just illuminate a room.
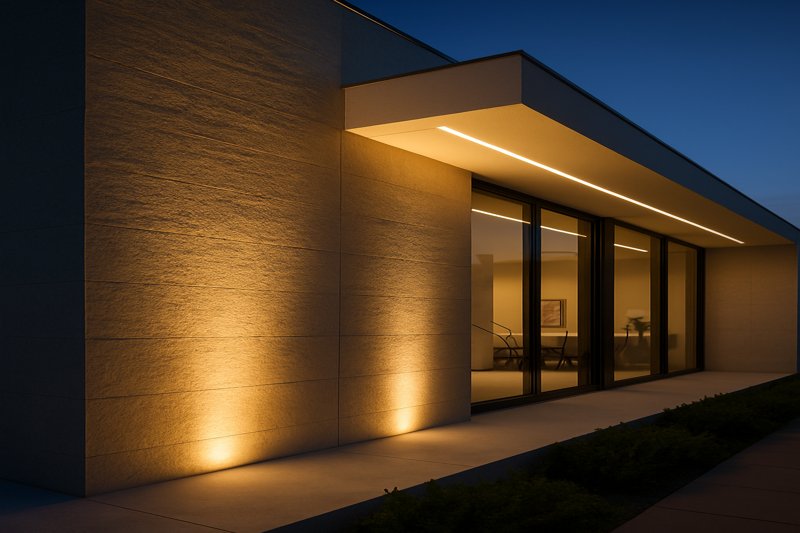
In my role as a manufacturer, I have the privilege of seeing the blueprints and final photos from some of the best lighting designers and architects in the world, including professionals like Tom. The number one principle that separates high-end architectural work from standard installations is this: you should feel the light, but you should never see where it comes from. The LED strip is not a fixture to be seen; it is a tool to be concealed. It is a brush you use to paint with light, accentuating the forms, textures, and lines that the architect has created. This mindset shift—from "installing lights" to "integrating illumination"—is the key to creating spaces that feel truly special and luxurious.
Why Should You Never See the LED Strip Itself?
Your installation is complete, but when the lights are on, all the client can focus on are the distracting, bright dots of the individual LEDs reflecting on their polished floor. The effect is cheap, not chic. What went wrong?
Exposed LED diodes, or "dotting," immediately break the illusion of integrated light and cheapen the overall feel of a space. The professional goal is always a smooth, continuous line of light with no visible hotspots, created by using the correct channel and diffuser.
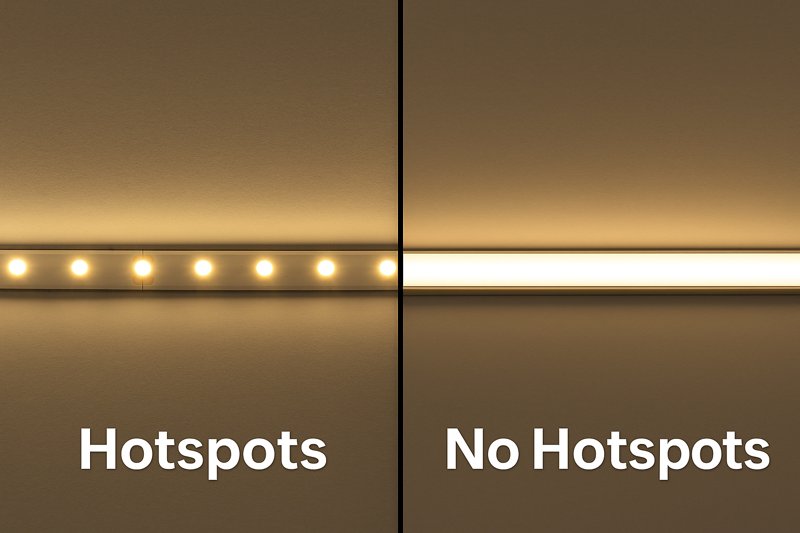
This is the most common mistake I see, and it’s the clearest sign of an amateur installation. You could have the most expensive, high-quality LED strip on the market, but if you can see the individual points of light, the project has failed from a design perspective. The light source becomes a distraction that pulls the eye away from the beautiful surface or architectural detail you intended to highlight. Achieving that flawless, unbroken line of light isn’t magic; it’s a matter of understanding the interplay between the LED strip’s chip density and, most importantly, the aluminum channel and diffuser you house it in. It’s an essential technical step to achieving a high-end aesthetic.
A Deeper Dive into Creating ‘Hotspot-Free’ Illumination
A design-conscious client like Tom needs to guarantee his clients a flawless finish. Providing this technical knowledge builds immense trust.
-
The Channel and Diffuser: Your Most Important Tools
The aluminum channel (or extrusion) and its plastic cover (the diffuser) are not optional accessories; they are a critical part of the lighting system.- Channel Depth1: The distance between the LED chip and the diffuser is the single biggest factor in eliminating hotspots. A shallow channel places the diffuser too close to the LEDs, making it impossible to blend the light. A deeper channel provides the necessary space for the light to mix and spread out before it hits the diffuser, resulting in a smooth glow.
- Diffuser Type: Diffusers are typically available in clear, frosted, or opal (milky white). For architectural applications, a frosted or opal diffuser2 is almost always the correct choice. It scatters the light, effectively blurring the individual points into a single line. A clear cover offers physical protection but does nothing to diffuse the light.
- LED Strip Density3: This refers to the number of LED chips per meter (or foot). A higher density strip (e.g., 240 LEDs/m) has less space between the chips, making it inherently easier to diffuse into a smooth line compared to a low-density strip (e.g., 60 LEDs/m). For architectural work where the fixture might be subtly visible, a high-density strip is a wise investment.
-
Matching the System to the Application
You must select the right combination for the job.
| Desired Effect | LED Density | Channel Depth | Diffuser Type | Result |
|---|---|---|---|---|
| Complete invisibility (e.g., in a deep cove) | Standard (120/m) | Not critical | Not critical | Source is hidden, effect is indirect. |
| Grazing a wall (visible light line) | High (240/m) | Deep (>15mm) | Opal/Frosted | A perfect, hotspot-free line of light. |
| Task lighting under a cabinet | High (240/m) | Standard/Deep | Frosted | Reduces reflected glare on countertops. |
| Low-budget, hidden accent | Standard (120/m) | Shallow/Surface-mount | Frosted | May have slight spotting up close. |
By mastering these combinations, you move from simply installing a product to designing a custom lighting fixture on-site, perfectly tailored to the architectural needs of the space.
How Do You Layer Light for Depth and Function?
The room is lit, but it feels flat and boring. There’s one layer of uniform light from the ceiling, creating a shadowless environment that has no mood or visual interest. How do you create an atmosphere that feels rich and dynamic?
Professionals create visual interest by layering three types of light: Ambient (general), Task (functional), and Accent (focal). LED strips are uniquely suited to deliver all three layers seamlessly and discreetly, adding depth, purpose, and drama to a space.
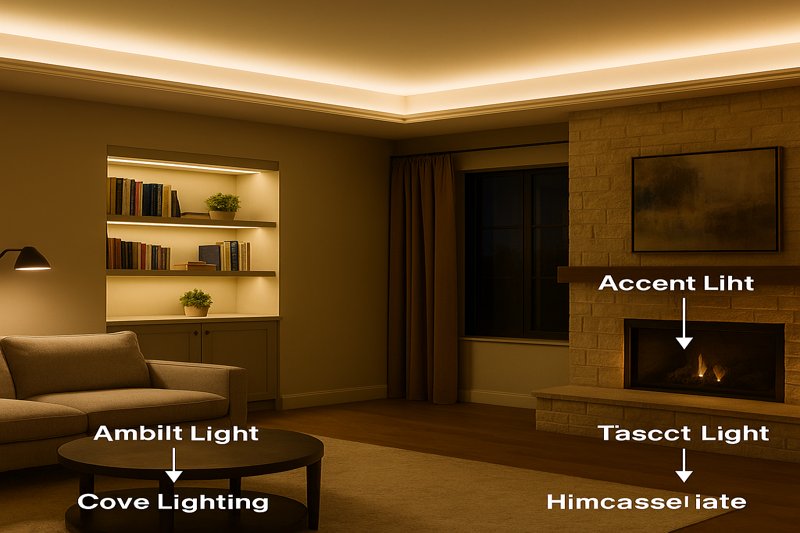
Thinking in layers is the absolute foundation of good lighting design. A single type of lighting can never create a successful space. A room with only ambient light is dull. A room with only task light is harsh and full of dark corners. A room with only accent light is impractical and overly dramatic. It is the sophisticated interplay between all three that creates a comfortable, functional, and beautiful environment. The slim, linear nature of LED strips makes them the ultimate tool for this strategy. You can hide them in tiny coves for ambient light, tuck them under cabinets for task light, and recess them into floors to highlight a feature wall, all using the same core technology.
A Deeper Dive into Lighting Layers with LED Strips
For Tom, being able to articulate this strategy to an architect or end-user demonstrates that he understands the art of lighting, not just the hardware.
-
Layer 1: Ambient Light (The Foundation)
This is the general, overall illumination that makes a space feel safe and navigable. With LED strips4, this is best achieved indirectly.- Technique: Cove Lighting5. This is the quintessential architectural lighting application. High-output LED strips are installed in a ledge or "cove" around the perimeter of a room, pointing upwards. The light bounces off the ceiling, creating a soft, diffuse glow that fills the space without any glare. It makes ceilings feel higher and the entire room feel more spacious and luxurious.
-
Layer 2: Task Light (The Workhorse)
This is functional, focused light for specific activities like reading, cooking, or working.- Technique: Under-Cabinet & Integrated Lighting6. This is where LED strips excel. Their low profile allows them to be mounted directly under kitchen cabinets to illuminate countertops, inside closets to light up clothing, or built into the headboard of a hotel bed for reading. Here, you would use a medium-to-high output strip in a channel with a diffuser to provide strong, even light on the work surface.
-
Layer 3: Accent Light (The Drama)
This is the light that creates visual interest and highlights architectural features, artwork, or textures.- Technique: Wall Grazing & Washing7.
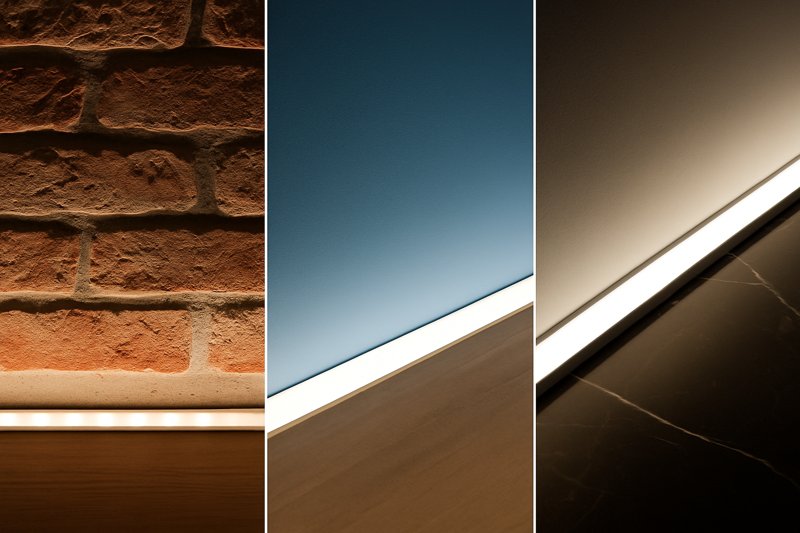
- Grazing: The light source is placed very close to a textured surface like stone, brick, or ribbed wood. The light strikes the surface at a sharp angle, creating dramatic shadows that reveal and exaggerate the texture.
- Washing: The light source is placed further away from a smooth wall. This bathes the surface in a smooth, even layer of light, which can make a space feel larger or draw attention to a piece of artwork.
- Technique: Wall Grazing & Washing7.
| Light Layer | Purpose | Common LED Strip Technique | Recommended Product |
|---|---|---|---|
| Ambient | General, comfortable illumination. | Cove Lighting, Ceiling Features | High-output (e.g., >6W/ft) strip hidden from view. |
| Task | Focused light for activities. | Under-cabinet, Shelf, Vanity | Medium-output strip in a channel with a good diffuser. |
| Accent | Create drama, highlight features. | Wall Grazing, Toe-kick, Stair lighting | Low-to-medium output strip, often in a specialized channel. |
By skillfully combining these three layers, you transform a simple room into a sophisticated architectural experience.
How Does Light Interact with Different Materials?
You’ve designed a beautiful lighting effect for a feature wall, but when it’s installed, it doesn’t look right. The light that looked great on a white wall looks harsh and strange on the client’s polished granite surface.
The final appearance of your lighting is dictated by the material it illuminates. You must consider the surface’s color, texture, and reflectivity (specularity) and adjust your lighting angle, intensity, and color temperature to complement it effectively.
This is a master-level concept that demonstrates a true understanding of the physics of light. Light is not an independent entity; it only becomes visible when it strikes a surface. Therefore, the properties of that surface are just as important as the properties of the light source. A rookie installer might use the same lighting technique for every wall, but a professional designer knows that a lighting scheme must be tailored to the material palette of the space. Ignoring this can lead to unintended consequences like harsh glare, washed-out colors, or a failure to reveal the very texture you meant to highlight. Getting this right is the difference between a good installation and a breathtaking one.
A Deeper Dive into Light and Materiality
Understanding these principles allows Tom to have more intelligent, collaborative conversations with architects and interior designers, positioning him as a valued partner.
-
Texture: Matte vs. Textured Surfaces
- Matte/Smooth Surfaces (e.g., Drywall): These surfaces are forgiving. They reflect light diffusely, creating soft shadows. They are ideal for wall washing8, where you want a smooth, even gradient of light to make a space feel bright and open.
- Textured Surfaces (e.g., Stone, Brick, Wood): These surfaces come alive with wall grazing9. Placing the light source very close to the surface creates long, sharp shadows that emphasize the natural texture and depth of the material. A bright light washing over a textured wall from a distance can actually flatten it and hide its character.
-
Reflectivity: Matte vs. Glossy Surfaces
- Matte Surfaces (e.g., Flat Paint, Concrete): These surfaces absorb more light and reflect it non-directionally. You can light them from almost any angle without worrying about harsh reflections.
- Glossy/Specular Surfaces (e.g., Polished Marble, High-Gloss Cabinets, Water): These surfaces act like a mirror. If you can see the surface, you will see a direct reflection of the light source. This is where hiding the light source and ensuring it is perfectly diffused is absolutely critical. A reflection of individual LED dots on a polished floor or countertop screams "low-quality." For these surfaces, indirect lighting10 (bouncing the light off a nearby matte surface) is often the best strategy.
| Material Type | Primary Characteristic | Best Lighting Technique | Why it Works |
|---|---|---|---|
| Textured Stone/Brick | Rough Texture | Wall Grazing | Sharp angles create dramatic shadows, revealing the material’s depth. |
| Smooth Painted Drywall | Matte, Smooth | Wall Washing | Creates an even, soft gradient of light, making the space feel open. |
| Polished Granite/Marble | Glossy, Reflective | Indirect Lighting | Avoids direct, harsh reflections of the light source, creating a soft sheen. |
| Natural Wood | Color & Grain | High CRI (>95) Light | Accurately renders the warm, rich tones and subtle grain of the wood. |
By analyzing the architectural finishes first, you can design a lighting plan that works in harmony with them, ensuring the final result is intentional, sophisticated, and beautiful.
Conclusion
Professional architectural lighting is a discipline of subtlety. It’s about hiding the source, layering the effects, and respecting the materials. Master these principles, and you will transform your projects from simple illumination into unforgettable architectural experiences.
-
Learn how channel depth impacts light diffusion and can help you eliminate hotspots for a flawless finish. ↩
-
Explore the advantages of frosted or opal diffusers to enhance your lighting design and achieve a smooth glow. ↩
-
Understanding LED strip density can help you choose the right lighting for your project, ensuring optimal diffusion and aesthetics. ↩
-
Find out how LED strips can transform your lighting strategy and improve the overall look of your home. ↩
-
Explore this link to understand how Cove Lighting enhances ambiance and elevates interior spaces. ↩
-
Discover how Under-Cabinet & Integrated Lighting improves functionality and aesthetics in kitchen design. ↩
-
Learn about Wall Grazing & Washing techniques to create stunning visual effects in your spaces. ↩
-
Explore this link to understand how wall washing enhances spaces by creating soft, even gradients of light. ↩
-
Learn about wall grazing and how it emphasizes textures, adding depth and character to your interiors. ↩
-
Discover the benefits of indirect lighting and how it can create a soft ambiance without harsh reflections. ↩
Interested in Our LED Solutions?
Get professional consultation and customized LED lighting solutions for your projects. Contact our expert team today.
Related Articles

How Do You Build Profitable Custom Vehicle and RV Interior LED Rope Lights?
You lose RV installation contracts because your interior lights fail on rough roads. Standard strips show bright dots on glossy…

How to Perfect Bookshelf and Display Cabinet LED Rope Lighting?
You lose retail clients when bookshelves look incredibly dark. Ugly shadows hide expensive products inside display cabinets daily. You need…

How to Master Mirror and Vanity LED Rope Light Installation?
Your clients complain about ugly shadows in their bathroom mirrors. Bad lighting ruins expensive vanity designs. You lose future contracts…
