
How Do You Properly Hang LED Strip Lights on Textured Walls?
You’ve planned the perfect lighting layout. But when you press the strip onto that "orange peel" or "popcorn" wall, it starts peeling off before you’ve even packed your tools. It’s frustrating and unprofessional.
Do not rely on the strip’s pre-applied adhesive. The only professional and permanent way to hang LED strips on textured walls is to first install a slim aluminum mounting channel. The channel is mechanically fastened to the wall, creating a smooth, ideal surface for the strip.
From my experience as a manufacturer, I can tell you that the adhesive on the back of any LED strip is designed for a perfectly smooth, clean, non-porous surface. Textured walls are the exact opposite of that. Trying to fight this reality will only lead to callbacks and unhappy clients. Let’s explore why the adhesive fails and what the truly reliable solutions are.
Why Do My LED Strips Keep Falling Off?
You press the strip firmly onto the wall, it seems secure, but a day later you find it sagging or completely on the floor. Why won’t it stick?
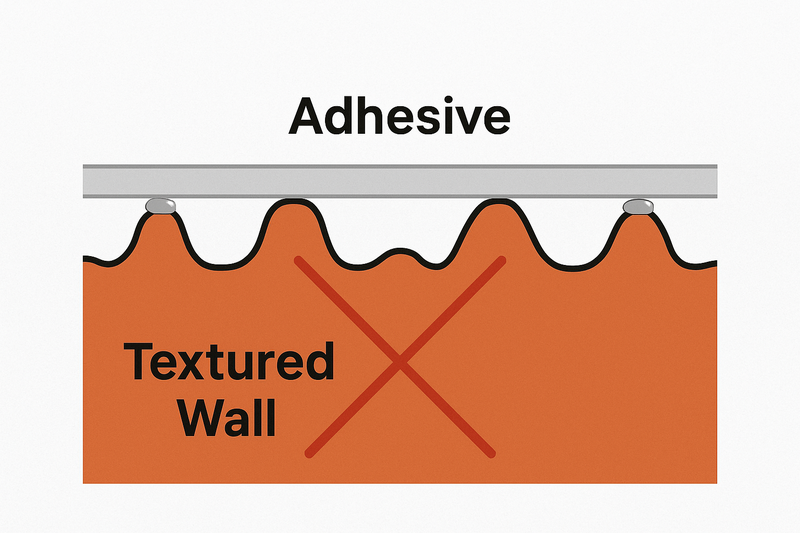
The adhesive fails because a textured wall has up to 70% less surface area for the tape to bond with. The adhesive only touches the tiny "peaks" of the texture, not the "valleys," creating a weak connection that is easily defeated by gravity and temperature changes.
The standard adhesive is simply not fighting a fair battle. Textured surfaces are also dusty by nature, filled with microscopic pits that hold dust and paint particles, which further prevent a clean bond. Add in the subtle expansion and contraction from daily temperature shifts, and the weak grip is guaranteed to fail. It’s a physics problem, not a faulty product issue.
The Science of Adhesive Failure
Understanding why it fails is the first step to finding a real solution. Three main factors are working against you.
- The Surface Area Deficit1: Imagine trying to stick a piece of tape to a bed of nails. It only touches the very tips. A textured wall is a microscopic version of this. The lack of a flat, continuous surface means the adhesive can’t achieve the full bond strength it was designed for.
- Contamination: The tiny crevices in textured paint are traps for dust, oils, and moisture. Even after a surface wipe-down, these contaminants remain in the low spots, preventing the adhesive from ever making a clean connection with the wall structure itself.
- Environmental Stress2: An LED strip generates a small amount of heat. This heat can soften the adhesive, making it more pliable and weak. In a cold room, the adhesive can become brittle. This constant cycle of warming and cooling, combined with the strip’s own weight, will inevitably break the weak bond.
| Wall Surface | Adhesive Contact | Bond Strength | Long-Term Reliability |
|---|---|---|---|
| Smooth, Clean | ~95-100% | Excellent | High |
| Textured Wall | ~20-40% | Very Poor | Very Low (Will Fail) |
How Can You Hang Strips on Textured Walls Without Drilling?
You’re working in a rental property or on a delicate surface where drilling holes is not an option. What is the next best choice for getting the strips to stay up?
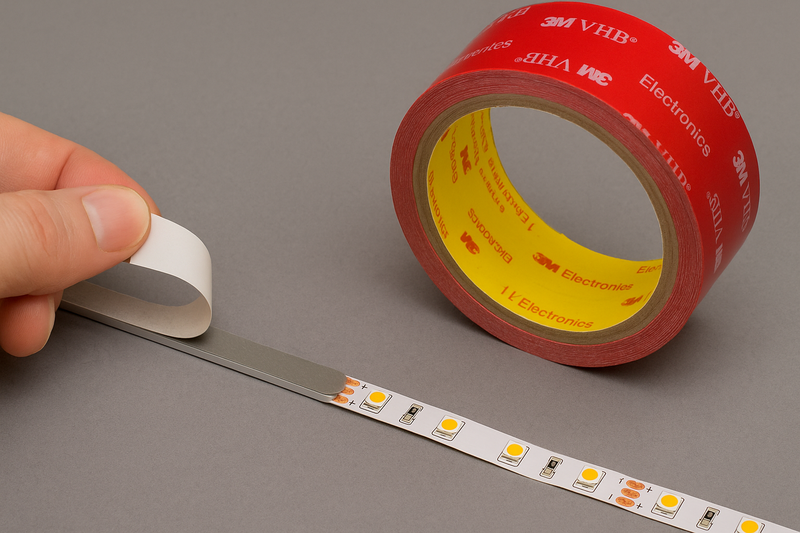
While not a permanent solution, the best non-drilling method is to use a stronger, specialized mounting tape like 3M VHB (Very High Bond). This tape has a foam core that can conform slightly to the texture, but it may still peel paint upon removal.
This is a compromise, and I want to be very clear about that. Using a superior adhesive foam tape can work for a time, especially on lightly textured walls if the surface is perfectly cleaned first. However, you are still fighting the same battle against low surface area and gravity. More importantly, these strong adhesives often create a bigger problem later: when they are removed, they will likely take a large chunk of paint and drywall paper with them.
The Stronger Adhesive Compromise
If drilling is truly impossible, you can increase your chances of success with a better adhesive strategy3, but you must accept the risks.
- Choose the Right Tape: Don’t use standard craft store mounting tape. 3M VHB is an industrial-grade acrylic foam tape that is significantly stronger than the adhesive that comes on the strips. Its foam construction allows it to make slightly more contact with the uneven surface.
- Preparation is Everything: This is non-negotiable. Clean the path on the wall where the strip will go with a lint-free cloth and isopropyl alcohol. This removes oils and residues that interfere with adhesion. Let it dry completely.
- The Removal Problem: This is the critical trade-off. The bond from VHB tape is so strong that it is more likely to rip the paint and paper face off your drywall than it is to release cleanly. This can cause far more "damage" than the small, easily-spackled screw holes from a mounting clip.
| Method | Holding Power on Texture | Wall Damage Risk Upon Removal |
|---|---|---|
| Standard Strip Adhesive | Very Low | Low (because it falls off) |
| 3M VHB4 Tape | Moderate | High (Will likely peel paint) |
| Mechanical Fasteners (Screws) | Excellent | Low (Tiny, repairable holes) |
What Is the Professional Way to Mount Strips Without Ruining the Wall?
You need the installation to be permanent, straight, and professional. You need a method that will not fail and that protects both the strip and the wall.
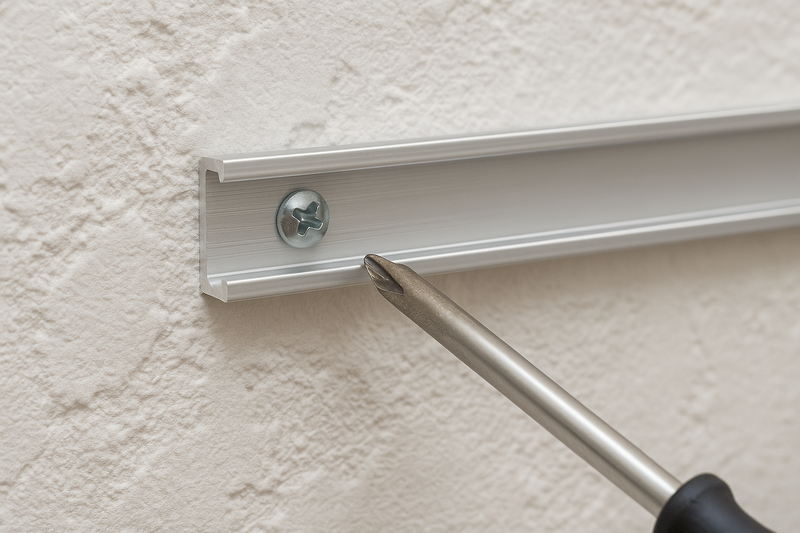
Use aluminum channels. These lightweight channels are mounted to the wall with small screws via tiny mounting clips. The strip’s adhesive then sticks perfectly to the smooth metal surface inside the channel. This completely solves the texture problem and protects the strip.
This is the solution I provide to all my professional clients like Tom. It turns an impossible surface into a perfect one. The idea that this "damages" the wall is a misconception. A few tiny screw holes that can be filled with a dab of spackle are infinitely better than long, ugly strips of ripped-off paint from failed adhesive. A channel is the mark of a truly professional and durable installation.
The Benefits of a Mounting Channel
A channel does far more than just solve the texture problem.
- A Perfect Mechanical Bond5: The channel is physically attached to the wall. It cannot fail unless the wall itself does. It bridges over all the peaks and valleys of the texture, creating a secure, permanent fixture.
- An Ideal Adhesive Surface: The inside of the aluminum channel is smooth, clean, and flat—the perfect surface for the LED strip’s adhesive to form a powerful, lasting bond.
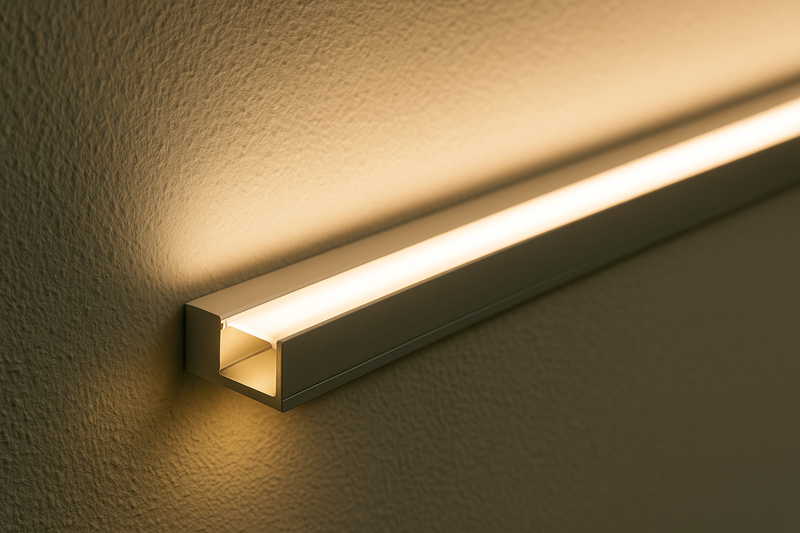
- Heat Dissipation & Protection6: The aluminum acts as a heat sink, drawing heat away from the LEDs and extending their lifespan. The diffuser cover protects the strip from dust, moisture, and physical bumps. It also hides the individual LED dots, creating a smooth, uniform line of light.
| Mounting Method | Secures Strip? | Protects Strip? | Looks Professional? |
|---|---|---|---|
| Adhesive Only | No | No | No (when it sags) |
| Channel System | Yes | Yes | Yes |
What Are the Chances of LED Lights Catching Fire?
A client expresses concern about installing a long run of lighting, worrying that it might be a fire hazard, especially if it’s not installed correctly.
The chance of a high-quality, UL-listed LED strip catching fire is extremely low. The real, albeit small, fire risk in any lighting system comes from faulty wiring, overloaded low-quality power supplies, or covering the strips with flammable materials that prevent heat from escaping.
LEDs themselves are low-power, low-heat solid-state devices. They don’t have a filament that can burn out like an old bulb. When you buy from a reputable supplier, the products are tested and certified to be safe. The problems arise from the surrounding electrical components, not the LEDs. This is another reason professional installation is so important—it ensures all connections are secure and the power supply is correctly sized for the load.
Understanding the Real Electrical Risks
Focus on the power system, not the LEDs themselves.
- Poor Connections7: Loose wire nuts or faulty solderless connectors can create electrical arcs and high resistance, which generates significant heat. This is the most common point of failure and risk. All connections must be secure.
- Overloaded Power Supply8: Using a cheap, uncertified power supply or trying to run too many strips from one small driver is dangerous. A quality power supply will have built-in protections that shut it down if it overheats or is overloaded. A cheap one may fail and become a fire risk.
- Lack of Ventilation: LED strips need to dissipate a small amount of heat. Covering them with cloth, wood, or other insulating materials can trap this heat, causing the components to degrade prematurely and, in extreme cases, become a hazard. Mounting strips in an aluminum channel is the best practice for proper heat dissipation.
| Component | Risk with Quality, Certified Product | Risk with Cheap, Uncertified Product |
|---|---|---|
| LED Strip | Extremely Low | Low |
| Power Supply | Very Low | Moderate |
| Wiring | Very Low (if installed correctly) | Moderate (if installed poorly) |
Conclusion
Stop fighting with adhesives on textured walls. For a permanent, professional, and safe installation that will never fall, use aluminum mounting channels. They are the definitive solution to the problem of textured surfaces.
-
Understanding the Surface Area Deficit is crucial for improving adhesive performance and ensuring strong bonds. ↩
-
Exploring Environmental Stress helps in recognizing factors that weaken adhesive bonds, leading to better application techniques. ↩
-
Discover various adhesive strategies that can improve your mounting success and minimize damage. ↩
-
Explore this link to understand the unique properties of 3M VHB tape and how it can enhance your adhesive projects. ↩
-
Understanding the concept of a Perfect Mechanical Bond can enhance your knowledge of secure mounting solutions. ↩
-
Exploring Heat Dissipation & Protection will help you learn how to extend the lifespan of your LED installations. ↩
-
Exploring the impact of poor connections can enhance your knowledge of electrical safety and improve your installation practices. ↩
-
Understanding the risks of overloaded power supplies can help prevent electrical hazards and ensure safety in your projects. ↩
Interested in Our LED Solutions?
Get professional consultation and customized LED lighting solutions for your projects. Contact our expert team today.
Related Articles

How Do You Build Profitable Custom Vehicle and RV Interior LED Rope Lights?
You lose RV installation contracts because your interior lights fail on rough roads. Standard strips show bright dots on glossy…

How to Perfect Bookshelf and Display Cabinet LED Rope Lighting?
You lose retail clients when bookshelves look incredibly dark. Ugly shadows hide expensive products inside display cabinets daily. You need…

How to Master Mirror and Vanity LED Rope Light Installation?
Your clients complain about ugly shadows in their bathroom mirrors. Bad lighting ruins expensive vanity designs. You lose future contracts…
