
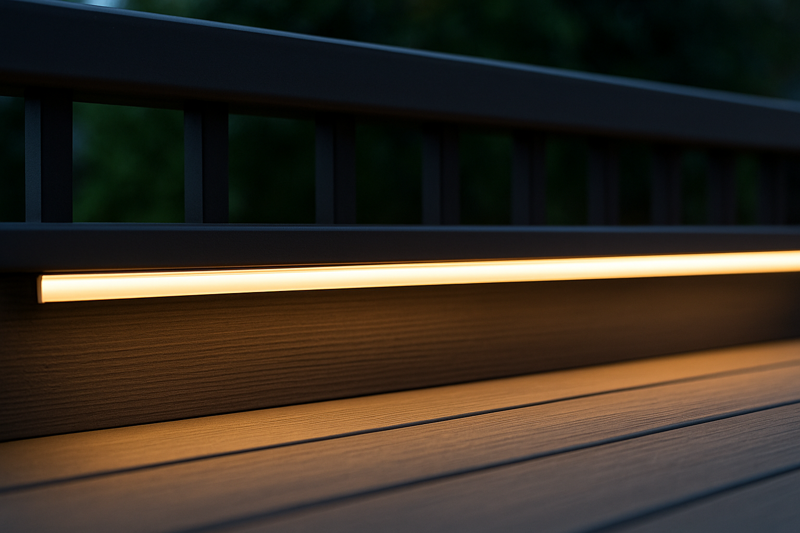
How Do You Properly Install Outdoor LED Strip Light?
You’re about to install a beautiful outdoor LED strip, but you’re worried. A bad installation means peeling, flickering, and water damage, forcing you to go back to the job site and fix it for free.
Proper installation involves five key steps: calculating power needs, meticulously preparing the surface, using mounting clips in addition to adhesive, making secure wire connections, and thoroughly waterproofing every single connection point with silicone and heat shrink tubing.
I’ve seen countless installations fail not because of a faulty product, but because of a missed step in the process. Taking the time to do it right from the beginning saves you from costly callbacks and protects your reputation. Let’s walk through the professional process I teach my own teams to ensure a flawless, durable installation every time.
What Do You Need Before You Start the Installation?
You’re at the client’s site, ready to work, but you realize your power supply is too weak or your lead wires are too short. Now a simple job is delayed by a trip to the supplier.
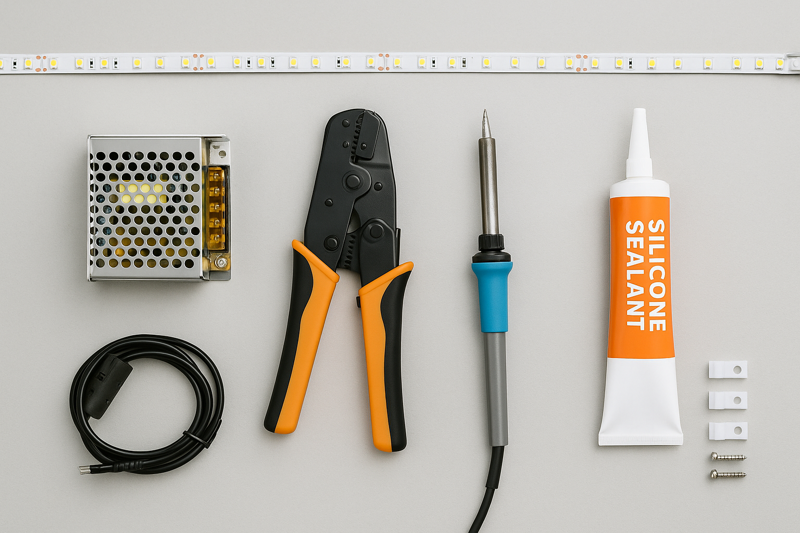
Before starting, prepare a plan. Measure the exact length of strip needed, calculate the total wattage to choose the correct power supply (adding a 20% buffer), and gather all your tools and materials like wire, clips, and silicone sealant.
Proper preparation is 50% of the job. A few minutes of calculation and planning in the workshop prevents hours of frustration on-site. The most common mistake I see is under-specifying the power supply, which causes it to overheat and fail prematurely. Always give yourself that 20% safety margin.
The Pre-Installation Checklist
Before you even think about mounting the strip, you need to have a solid plan and the right components.
- Calculate Your Power Needs1: This is non-negotiable. The formula is simple: (Strip’s Watts-per-Meter x Total Project Meters) x 1.2 = Minimum Power Supply Wattage. The "x 1.2" is that critical 20% buffer. It ensures the power supply isn’t running at 100% capacity, which drastically increases its lifespan.
- Choose the Right Wire Gauge2: For the wire running from the power supply to the strip, you must account for voltage drop. For longer runs (over 5 meters / 16 feet), you will need thicker wire (a lower American Wire Gauge number, like 18 AWG or 16 AWG) to ensure full brightness.
- Gather Your Tools: Having everything ready makes the job smooth. You’ll need a tape measure, isopropyl alcohol, a soldering iron and solder, wire strippers, adhesive-lined heat shrink tubing, a heat gun, silicone sealant, and of course, the mounting clips and screws for your strip.
| Calculation Step | Example for a 15-meter run of 14W/m strip | Your Project |
|---|---|---|
| 1. Find Total Wattage | 14 W/m * 15m = 210 Watts | |
| 2. Add 20% Safety Buffer | 210W * 1.2 = 252 Watts | |
| 3. Minimum Power Supply | Choose a 24V power supply rated for 260W or higher. |
How Do You Prepare the Surface for Mounting?
You carefully installed the strip, pressing it down firmly. A week later, you get a call that it’s peeling off because the surface was dusty or porous.
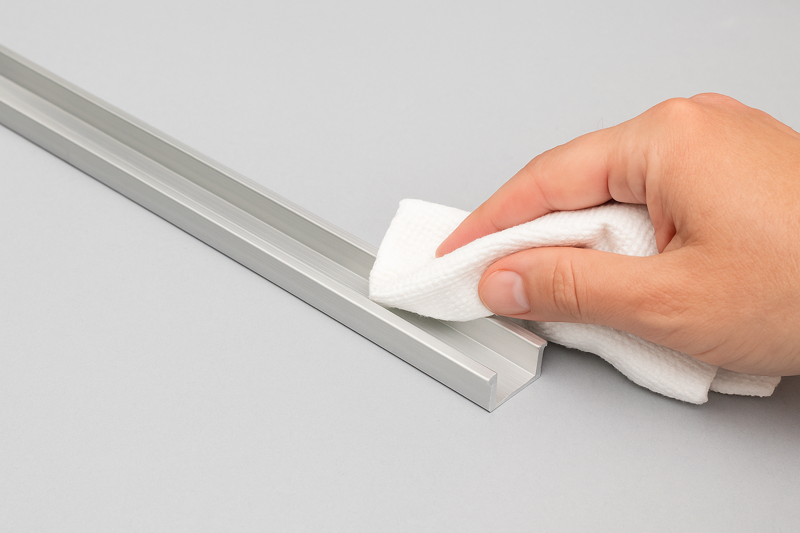
The surface must be completely clean, dry, and non-porous. Wipe down metal, plastic, or finished wood with isopropyl alcohol. For rough surfaces like concrete, brick, or unfinished wood, you must first install the strip inside an aluminum channel.
The adhesive on the back of any LED strip is only as good as the surface it’s sticking to. Think of it like painting a wall—you would never paint over dust and grease. The same principle applies here. Trying to stick a strip directly to a porous surface like concrete is a guaranteed failure; the adhesive has nothing to properly bond with.
Creating the Perfect Foundation
The long-term physical security of your strip depends on this step.
- Clean, Dry, and Smooth: For any non-porous surface like aluminum, glass, or smooth painted metal, the process is simple. First, clean it with a basic degreaser if it’s very dirty. Then, do a final wipe-down with isopropyl alcohol. This removes any residual oils or dust and allows the adhesive to form a strong bond. Wait for the alcohol to fully evaporate before applying the strip.
- The Porous Surface Problem: Surfaces like brick, stucco, concrete, and unfinished wood are problematic. They are dusty, and they absorb moisture, both of which will destroy the adhesive bond. The strip will peel off, often within days.
- The Aluminum Channel Solution: This is the professional standard for all high-quality outdoor installations, even on smooth surfaces. Mounting the LED strip inside a dedicated aluminum channel3 provides a perfect, clean surface for adhesion. It also protects the strip from physical damage, acts as a heat sink to extend the LED’s life, and diffuses the light for a more finished, dot-free look.
| Surface Type | Preparation Method | Professional Recommendation |
|---|---|---|
| Metal / Plastic | Clean with Isopropyl Alcohol | Always best to use an aluminum channel. |
| Smooth Painted Wood | Clean with Isopropyl Alcohol | Use an aluminum channel. |
| Concrete / Brick | Cannot apply directly. Adhesive will fail. | Must use an aluminum channel. |
| Unfinished Wood | Cannot apply directly. Adhesive will fail. | Must use an aluminum channel. |
What’s the Best Way to Mount Outdoor LED Strips Securely?
The strip’s adhesive seemed strong in your hands. But after a summer of heat expansion and a winter of cold contraction, the adhesive has given up, and the strip is sagging.
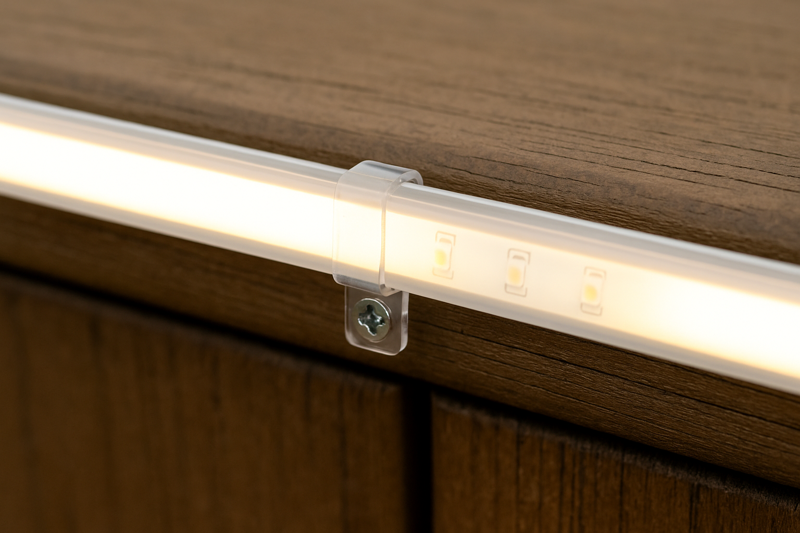
Never rely on the 3M adhesive tape alone for any permanent outdoor installation. You must use mounting clips or saddles to mechanically fasten the strip every 30-50 cm (1-1.5 feet). The adhesive is only for initial positioning.
This is probably the most critical piece of advice for physical installation. I tell my clients to think of the adhesive tape as a temporary "third hand" that holds the strip in place while you install the permanent clips. The clips bear the weight of the strip and manage the stress from thermal expansion and contraction. Without them, gravity and weather will always win.
Mechanical Fastening is a Must
Adhesive is a chemical bond; you also need a physical one.
- The Purpose of Adhesive: A high-quality 3M adhesive (like VHB tape) is excellent for creating an initial, even placement. It holds the strip perfectly straight in the channel or on the surface, allowing you to work cleanly without the strip moving around. But its holding power degrades over time with exposure to moisture and fluctuating temperatures.
- The Role of Mounting Clips: These are the real heroes of the installation. Clips are typically small plastic or metal brackets that you screw into the mounting surface. The strip then snaps into them. They provide a permanent mechanical connection that is unaffected by temperature or humidity. Placing one every foot or so ensures the strip will never sag or peel, even years later.
- Using Silicone as an Aid4: For extra security, especially when mounting inside a channel, you can apply a thin bead of clear silicone inside the channel before laying the strip down. The strip’s adhesive sticks to the silicone, and the silicone bonds to the channel, creating an incredibly strong and slightly flexible bond.
| Mounting Method | Initial Strength | Long-Term Reliability (Outdoors) | Professional Rating |
|---|---|---|---|
| Adhesive Tape Only | Good | Poor – Guaranteed Failure | Not Recommended |
| Adhesive + Mounting Clips5 | Excellent | Excellent | Best Practice |
| Silicone Bead Only | Fair (slow cure) | Good | Good Alternative |
How Do You Cut and Reconnect Outdoor LED Strips?
You need to make a 90-degree turn around a corner. You know you can cut the strip, but you’re worried about destroying its waterproof seal when you reconnect it.
Only cut on the designated copper cut lines. To prepare a waterproof strip for connection, you must very carefully use a razor blade to slice and peel away the silicone from the top, exposing the copper solder pads. The best and only reliable connection method for outdoors is soldering.

This is where many installers get nervous, but it’s a straightforward process. The biggest mistake is using solderless, clip-on connectors outdoors. I have never seen one last. They do not create a secure, corrosion-proof connection, and they are impossible to fully waterproof. Soldering is a skill every lighting professional should learn; it guarantees a perfect electrical connection that will last as long as the LEDs themselves.
Creating Lasting Connections
A bad connection will cause flickering and failure.
- Preparing the Strip: Once you cut the strip, you’ll see the copper pads are covered by the transparent silicone waterproofing. Take a sharp craft knife or razor blade and carefully cut a square around the pads. Then, use the blade to gently scrape or lift the silicone square off, exposing the clean copper beneath.
- Why Soldering is King: Soldering melts two metals together, creating a single, solid electrical connection. It is permanent, has very low resistance, and will not loosen over time due to vibration or temperature changes. It provides the most durable and reliable connection possible.
- Why Solderless Connectors6 Fail Outdoors: Solderless "clip" or "clamp" connectors work by using tiny metal teeth to bite into the copper pads. Outdoors, moisture will inevitably get into this mechanical connection, causing the copper to corrode and the connection to fail. They represent a major weak point in any outdoor system.
| Connection Method | Reliability | Waterproofing Potential | Skill Level Required |
|---|---|---|---|
| Soldering7 | Excellent | Excellent (when sealed) | Medium |
| Solderless Connectors | Poor | Poor | Low |
How Do You Make All Connections Completely Waterproof?
Your installation is complete, and all your soldered joints look perfect. But you know that if even a drop of water gets in, the whole section could fail.
Every connection must be sealed with a two-step process. First, inject the connector or end cap with a generous amount of non-corrosive, neutral-cure silicone. Then, slide an adhesive-lined heat shrink tube over the entire joint and heat it until the glue flows out.
This is the final and most important step to guarantee a long life for your outdoor installation. A single bad seal can compromise the entire run. Do not use electrical tape—it is not waterproof and will unravel over time. This dual-barrier approach of silicone plus adhesive heat shrink creates a seal that is both mechanically strong and 100% impervious to water.
The Belt-and-Suspenders Approach
You need to create a seal that can withstand years of rain, snow, and sun.
- Step 1: The Inner Barrier (Silicone): After soldering your wires, you need a silicone end cap for the end of the run or a silicone sleeve for a connection. Completely fill the cap/sleeve with a high-quality, neutral-cure silicone sealant (acid-cure can corrode the solder joints). Then, push the cap onto the strip, ensuring the silicone oozes out around the edges. This creates a void-free, waterproof blob around the electrical joint.
- Step 2: The Outer Barrier (Adhesive Heat Shrink): While the silicone is still wet, slide a piece of heat-shrink tubing that is lined with a heat-activated adhesive over the entire joint. Use a heat gun to shrink the tubing. As it shrinks, the inner adhesive lining melts, flows into any tiny crevices, and bonds to the strip and the wire. When you see a little bit of clear adhesive ooze out of the ends of the tube, you know you have a perfect, factory-grade seal.
| Sealing Method | Water Resistance | Durability | Professional Recommendation |
|---|---|---|---|
| Electrical Tape | Very Poor | Poor | Never Use Outdoors |
| Silicone Sealant Only | Good | Good | A good first step. |
| Silicone + Adhesive Heat Shrink | Excellent | Excellent | The Only Professional Method |
Conclusion
A proper outdoor LED installation is about process and patience. By carefully planning, preparing the surface, using mechanical clips, and creating fully waterproof connections, you ensure a professional result that will last for years.
-
Understanding how to calculate power needs is crucial for ensuring your LED strips function efficiently and safely. ↩
-
Selecting the correct wire gauge is essential for preventing voltage drop and ensuring optimal brightness in your LED installations. ↩
-
Explore how aluminum channels enhance LED strip installations by providing protection, heat dissipation, and improved aesthetics. ↩
-
Learn how silicone enhances bond strength and flexibility in mounting, ensuring a durable installation. ↩
-
Explore the advantages of mounting clips for a secure and reliable installation that withstands environmental changes. ↩
-
Learn about the limitations of solderless connectors and how moisture affects their performance. ↩
-
Explore the advantages of soldering for creating durable and reliable electrical connections. ↩
Interested in Our LED Solutions?
Get professional consultation and customized LED lighting solutions for your projects. Contact our expert team today.
Related Articles

How Do You Build Profitable Custom Vehicle and RV Interior LED Rope Lights?
You lose RV installation contracts because your interior lights fail on rough roads. Standard strips show bright dots on glossy…

How to Perfect Bookshelf and Display Cabinet LED Rope Lighting?
You lose retail clients when bookshelves look incredibly dark. Ugly shadows hide expensive products inside display cabinets daily. You need…

How to Master Mirror and Vanity LED Rope Light Installation?
Your clients complain about ugly shadows in their bathroom mirrors. Bad lighting ruins expensive vanity designs. You lose future contracts…
