
How Do You Securely Mount Outdoor LED Strip Lights?
You finished a beautiful outdoor lighting job. But a few months later, the client calls you. The LED strips are peeling off and sagging. This makes your work look cheap.
For a secure outdoor installation, never rely on adhesive tape alone. Use a combination of silicone mounting clips with stainless steel screws. For the best protection and a professional look, install the strips inside an aluminum channel with the correct cover.
Relying only on the sticky back of an LED strip is the most common installation mistake I see. As a factory owner supplying professionals like Tom in the US, I know that callbacks to fix fallen strips are costly and damage your reputation. The secret isn’t just one method, but a system that adapts to the environment. Let’s explore the professional techniques that ensure your installations look great on day one and five years later.
Is the Included Adhesive Tape Enough for Outdoor Use?
You see the convenient peel-and-stick backing on the LED strip. It seems like the easiest way to install it. But you worry if it will hold up through summer heat and winter frost.
No, the adhesive tape on its own is not sufficient for a permanent outdoor installation. It is only designed for initial positioning. Temperature changes and moisture will cause the adhesive to fail over time, especially on wood or concrete surfaces.
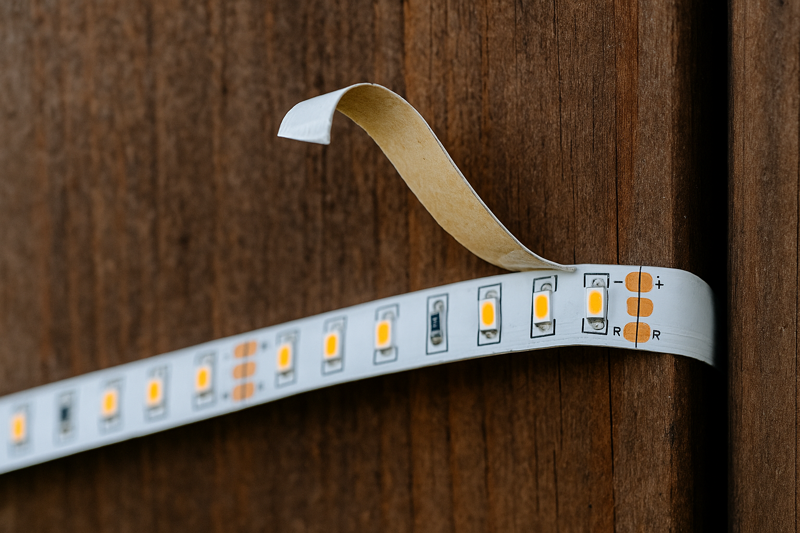
I’ve seen so many projects fail because of this one simple misunderstanding. The standard adhesive, even a good quality one like those from 3M, is tested in ideal lab conditions. The real world is different. An outdoor surface like a brick wall heats up under the sun and gets cold at night. This expansion and contraction breaks the adhesive bond. Add in rain, humidity, and the texture of the surface, and failure is almost guaranteed. I always tell my B2B clients, lighting designers and installers, to think of the tape as a temporary "third hand." It holds the strip in place perfectly straight while you install the permanent mounting hardware, like clips or channels. It’s a positioning tool, not a structural component.
Adhesion Method Reality Check
Understanding the limits of adhesive is key to planning a durable installation.
| Mounting Method | Best Use Case | Outdoor Longevity | Professional Appearance |
|---|---|---|---|
| Adhesive Tape Alone | Short-term, indoor, smooth surfaces | Very Poor (expect failure in months) | Poor (sags over time) |
| Adhesive + Clips1 | Good for most general outdoor needs | Good (will last for years) | Good (clips are visible but secure) |
| Aluminum Channel2 | Best for high-visibility & physical protection | Excellent (protects the strip itself) | Excellent (clean, linear look) |
| Conclusion for Pros | Never rely on tape alone outdoors. Use it to position the strip, then secure it with clips or channels. |
What Are the Best Mounting Clips for LED Strips?
You decided to use mounting clips for extra security. But you see cheap plastic clips and metal ones. Which one won’t damage the strip or rust in the rain?
Silicone mounting clips are the best choice. They are flexible and won’t damage the strip’s waterproof sleeve. Always pair them with stainless steel screws to prevent rust marks and ensure a strong, long-lasting hold on the mounting surface.
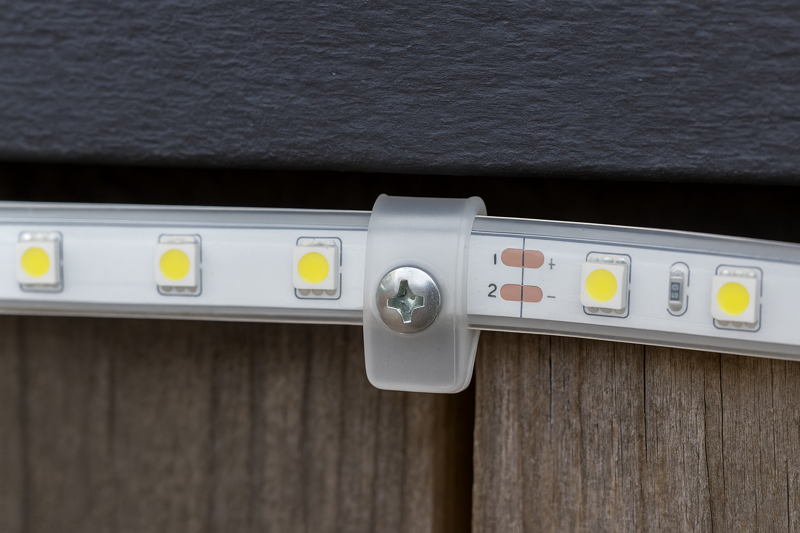
The material of the clip is very important. Cheap, hard plastic clips can become brittle from UV exposure and cold temperatures, then crack. This leaves your strip unsecured. Metal clips can be too rigid. If you tighten the screw too much, the sharp metal edge can cut into the silicone or PVC sleeve of the IP67 strip, creating a point for water to get in. This is why we, at Rhstriplighting, supply soft, translucent silicone clips with our outdoor strips. They grip the strip snugly without causing damage. Equally important is the screw. I once consulted for a contractor who used the right clips but cheap, zinc-plated screws. After one year, every screw head left an ugly rust streak running down the client’s white wall. Always insist on stainless steel for all outdoor hardware.
Comparing Mounting Clip Materials
The small details determine the longevity of your project. Choosing the right clip and screw combination is critical.
| Clip Material | Pros | Cons | Best For |
|---|---|---|---|
| Hard Plastic | Very cheap | Becomes brittle in sun/cold; can crack | Not recommended for outdoor use |
| Metal | Strong, durable | Can damage strip coating if over-tightened | Securing channels, not the strip directly |
| Silicone3 | Flexible, UV resistant, gentle on strip | Slightly more expensive than plastic | The ideal choice for securing outdoor strips |
| Screws | Stainless Steel4 is the ONLY option. | All outdoor applications. Prevents rust. |
Plan to place one clip at the start, one at the end, and then one every 30 to 50 centimeters (or 1 to 1.5 feet) for a secure, sag-free installation.
When Should You Use an Aluminum Channel for Outdoor Installations?
You see aluminum channels or extrusions in high-end projects. They seem like an extra cost and step. When is it truly necessary to use them for an outdoor installation?
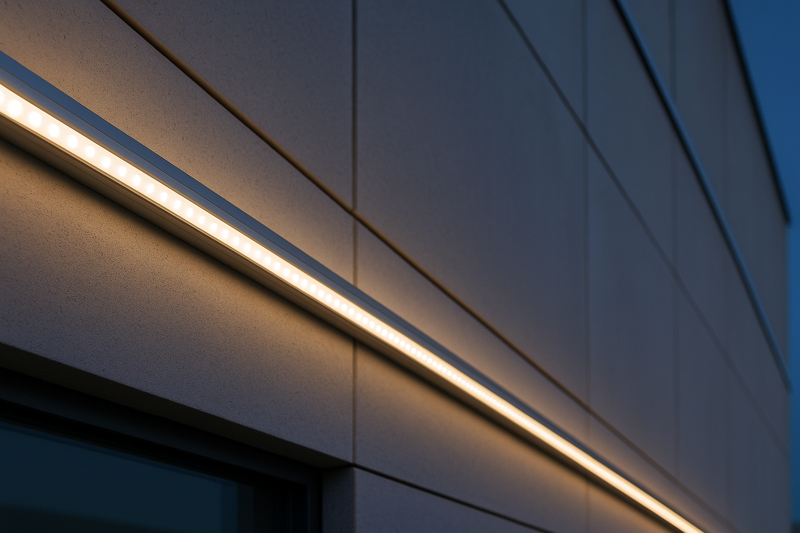
Use an aluminum channel when you need physical protection, better heat management, or a more finished, professional look. They are essential for areas with foot traffic, potential impacts, or where you want to diffuse the light to avoid visible "dots".
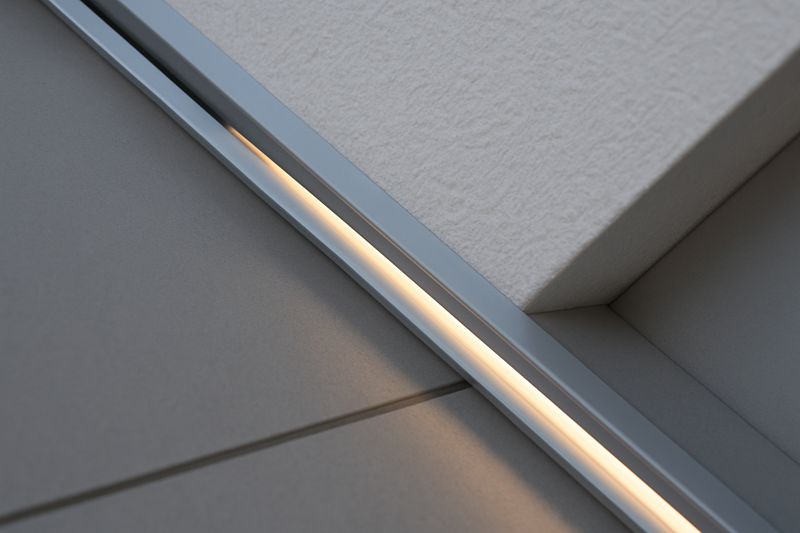
For my most quality-sensitive clients, like lighting architects in North America, aluminum channels are a default part of the specification. They do three things incredibly well. First, they offer physical protection. An uncovered IP67 strip on a porch step or low on a wall can be kicked or hit, damaging the LEDs. The channel and its polycarbonate cover protect it. Second, the aluminum acts as a heat sink. LEDs generate heat, and heat is the enemy of their lifespan. The channel pulls heat away from the strip, allowing it to run cooler and last longer. Third, it’s about aesthetics. A frosted or opal cover on the channel diffuses the light. This eliminates the harsh "hotspots" of individual LED chips and creates a smooth, continuous line of light. It’s the difference between a DIY look and a high-end architectural feature.
Decision Guide: To Channel or Not to Channel?
This simple breakdown can help you decide when the investment in channels is worthwhile for your project.
| Consideration | No Channel (Clips Only) | With Aluminum Channel | Recommendation |
|---|---|---|---|
| Light Appearance5 | Exposed LED dots, potential for glare | Smooth, linear, diffused light | Channel for a dot-free, high-end look. |
| Physical Protection6 | Vulnerable to impacts, abrasion, UV | Excellent protection from elements and damage | Channel for ground-level or high-traffic areas. |
| Heat Dissipation | Relies on ambient air | Excellent; acts as a heat sink | Channel for high-power strips to extend lifespan. |
| Installation Surface | Can follow uneven surfaces | Creates a perfectly straight, rigid line | Channel for a clean, architectural aesthetic. |
While channels add to the upfront cost, they also add immense value in terms of durability and visual quality, preventing costly replacements down the line.
How Do You Prepare Different Surfaces for Mounting?
You have the right clips and strips. But installing on rough concrete is very different from smooth metal. Improper surface preparation will cause any mounting method to fail.
Always start by cleaning the surface thoroughly with isopropyl alcohol to remove dirt and oils. For porous surfaces like wood or brick, use a bead of clear silicone adhesive underneath the strip in addition to mechanical clips for a robust bond.
The best hardware in the world won’t work on a dirty surface. I learned this early on when a client installing lights on a metal facade complained our clips were failing. It turned out the "clean" metal had a thin layer of industrial oil on it. The moment we had them wipe the area with alcohol, the problem was solved. The surface dictates the strategy. Smooth, non-porous surfaces like vinyl siding or metal flashing are the easiest. Porous surfaces like unsealed wood, brick, or stucco are the trickiest. They absorb moisture and have uneven textures. For these, adhesive tape is useless. Mechanical fasteners are required. I often recommend my contractor clients apply a thin line of outdoor-grade silicone sealant on the back of the strip before pressing it into place. This fills the small gaps and creates a much stronger bond before they add the clips.
Surface Preparation Quick Guide
Choose your method based on the material you are mounting to.
| Surface Type | Cleaning Method | Primary Mounting | Secondary Support |
|---|---|---|---|
| Metal / Vinyl / Glass | Isopropyl Alcohol | Adhesive Tape (for positioning) | Silicone Clips |
| Sealed / Painted Wood | Isopropyl Alcohol7 | Adhesive Tape (for positioning) | Silicone Clips |
| Unsealed Wood | Brush away loose debris, then wipe | Silicone Sealant | Silicone Clips (essential) |
| Brick / Concrete / Stucco | Wire brush to remove loose debris, then wipe | Silicone Sealant8 | Silicone Clips & Masonry Screws |
Taking five extra minutes to prepare the surface properly will save you hours of fixing problems later.
Conclusion
Secure outdoor mounting requires a system: clean the surface, use tape for placement, add silicone clips for strength, and use channels for protection. This ensures a professional, lasting result.
-
Explore this link to understand how adhesive and clips can enhance outdoor durability and appearance. ↩
-
Discover why aluminum channels provide superior protection and a professional look for your projects. ↩
-
Explore the advantages of silicone clips, especially their UV resistance and flexibility, making them perfect for outdoor use. ↩
-
Learn why stainless steel is essential for outdoor applications, preventing rust and ensuring durability. ↩
-
Explore how aluminum channels enhance light appearance, providing a smooth and diffused look for your projects. ↩
-
Learn about the protective benefits of aluminum channels, ensuring your LED lights withstand impacts and environmental factors. ↩
-
Explore this link to understand how Isopropyl Alcohol enhances adhesion and ensures a clean surface for mounting. ↩
-
Learn about the advantages of Silicone Sealant in providing a strong, flexible bond for various surfaces. ↩
Interested in Our LED Solutions?
Get professional consultation and customized LED lighting solutions for your projects. Contact our expert team today.
Related Articles

How Do You Build Profitable Custom Vehicle and RV Interior LED Rope Lights?
You lose RV installation contracts because your interior lights fail on rough roads. Standard strips show bright dots on glossy…

How to Perfect Bookshelf and Display Cabinet LED Rope Lighting?
You lose retail clients when bookshelves look incredibly dark. Ugly shadows hide expensive products inside display cabinets daily. You need…

How to Master Mirror and Vanity LED Rope Light Installation?
Your clients complain about ugly shadows in their bathroom mirrors. Bad lighting ruins expensive vanity designs. You lose future contracts…
