
Is Your Kitchen Lighting Making Your Food Look Gray and Unappetizing?
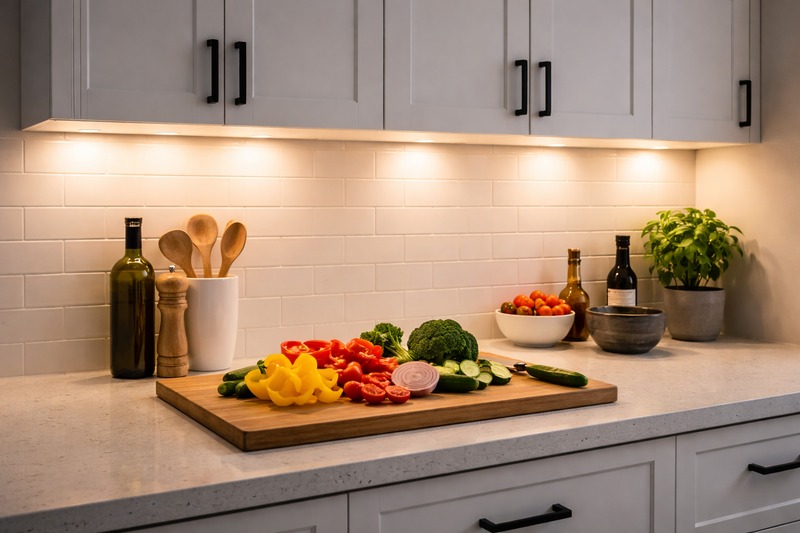
Chopping vegetables in your own shadow is dangerous and frustrating. You spent money on granite countertops, yet a single central ceiling light casts harsh shadows that ruin the aesthetic and function.
Under-cabinet LED rope lighting eliminates shadows on workspaces and adds a layer of luxury. The installation requires selecting High CRI (90+) lights to render food colors accurately, mounting them behind the cabinet’s front lip to hide the source, and using mechanical clips instead of adhesive to withstand kitchen heat and grease.
I have manufactured millions of meters of lighting. In the B2B world, we joke that the kitchen is the "Graveyard of Adhesive Tape." Homeowners stick lights up, and two months later, the lights fall into the pasta water because of the steam. Furthermore, most people buy the cheaper "Rope Lights" from big-box stores, install them, and then wonder why their steak looks gray. It’s not your cooking; it’s the Color Rendering Index (CRI). I am going to teach you how to install these like a contractor, not a hobbyist.
Why is "Rope Light" Often the Wrong Choice for Kitchens?
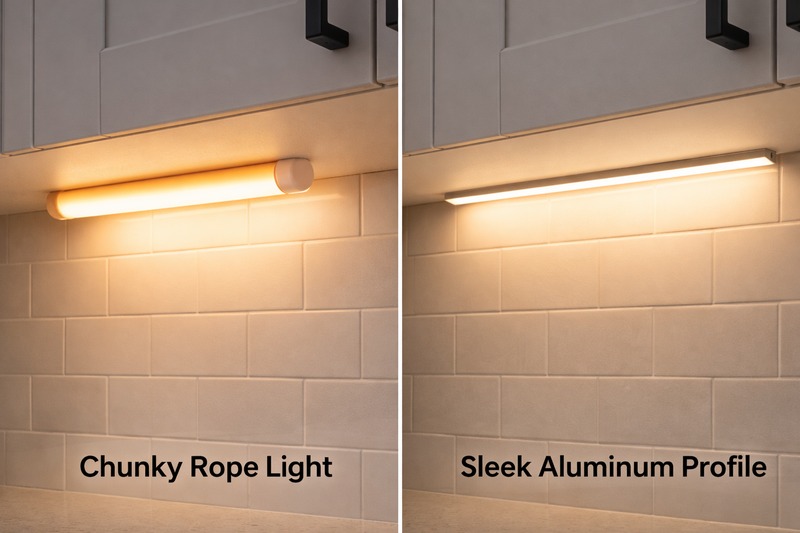
Many DIYers grab thick, round plastic tube lights because they look durable. However, their bulkiness makes them impossible to hide, and their light quality is often industrial, not residential.
Traditional round rope lights are 13mm thick, often sticking out below standard cabinet light rails. For a professional finish, you should use "Neon Flex" (flat rope light) or LED strips inside an aluminum profile. These options provide a dot-free glow and fit discreetly behind the cabinet lip.
Here is a factory insider secret: The thick, round clear tubing of a traditional "Rope Light" absorbs light and shifts the color. A 3000K chip might look like 3500K or green-tinted once it passes through thick, cheap PVC.
In a kitchen, CRI (Color Rendering Index) is everything.
Standard rope lights usually have a CRI of 70. This makes red apples look muddy and meat look suspect. You need CRI 90+. Usually, only high-end LED strips or specialized Neon Flex offer this.
Furthermore, consider the Reflection Problem. If you have polished granite or quartz countertops, they act like a mirror. If you install a rope light with spaced-out bulbs, your countertop will look like a disjointed string of pearls. You need a Diffuser.
If you insist on the "Rope" form factor, buy "Side-View Neon Flex." It is a silicone rope light where the light shoots out the side, not the top, creating a solid bar of neon light with no dots.
| Feature | Standard Round Rope Light | LED Strip + Diffuser | Factory Verdict |
|---|---|---|---|
| Thickness | 0.5 inch (Bulky) | 0.3 inch (Slim) | Strip hides better. |
| Heat Trap | High (PVC insulation) | Low (Aluminum dissipates) | Heat kills LEDs; Aluminum saves them. |
| CRI | Usually < 80 | Available 90+ | KPI for food appearance. |
| Reflection | Distinct "Dots" | Smooth Line | Smooth is luxury; Dots are cheap. |
Where Exactly Should You Mount the Light for Maximum Function?
Placement is the difference between lighting your backsplash tiles and lighting your cutting board. Most people guess and stick it in the middle, creating ineffective, washed-out lighting.
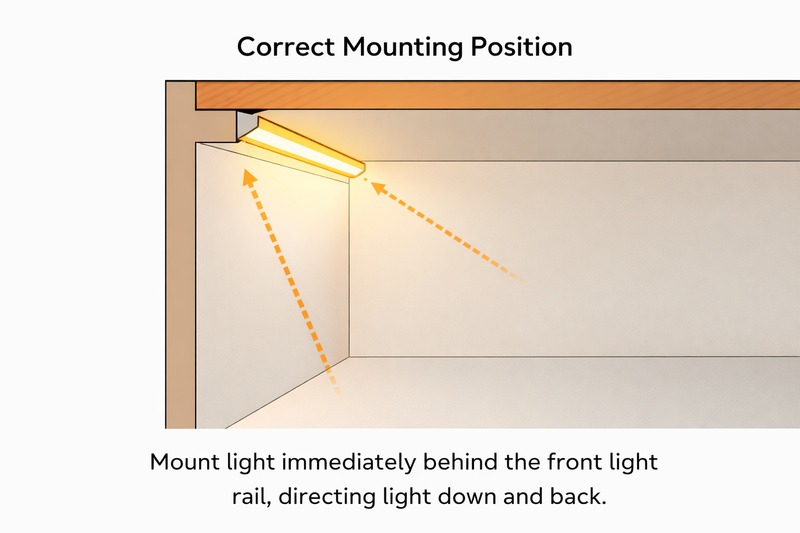
You must mount the light fixture as close to the FRONT of the cabinet as possible, just behind the face frame. This pushes light backward across the entire counter surface and prevents the fixture from blinding you when you sit at a nearby dining table.
I get calls from contractors asking why their customers are complaining about "Glare." The answer is always geometry.
If you mount the light at the back (near the wall), you are highlighting the grout lines of your backsplash (which is fine if that is the goal), but your hands will still cast shadows on your work area.
The Golden Rule: Mount it effectively behind the "Light Rail" (the decorative trim at the bottom of the cabinet).
The Grease Factor:
Kitchens are hostile environments. Cooking creates airborne grease and steam.
Self-adhesive backing (3M tape) will fail. It is not a matter of if, but when.
I refuse to guarantee installations that use only tape. You must use Mounting Clips or screw-in Aluminum Channels.
If you are drilling into the cabinet, STOP. Measure the screw length. Standard cabinet bottoms are 3/4 inch thick. If you use a 1-inch screw, you will poke through the bottom of your shelf and ruin your Tupperware storage. Use 1/2 inch screws or shorter.
| Mounting Location | Pros | Cons | Verdict |
|---|---|---|---|
| Front (Behind Lip) | Lights whole counter. | Harder to wire. | Best for Task Lighting. |
| Middle | Easy to reach. | Casts shadows. | Lazy installation. |
| Back (Near Wall) | Highlights backsplash. | Zero task light. | Best for Accent Only. |
| Diagonal (45° Corner) | Sends light outward. | Visible from seated height. | Good only for deep cabinets. |
How Do You Hide the Ugly Power Supplies and Cords?
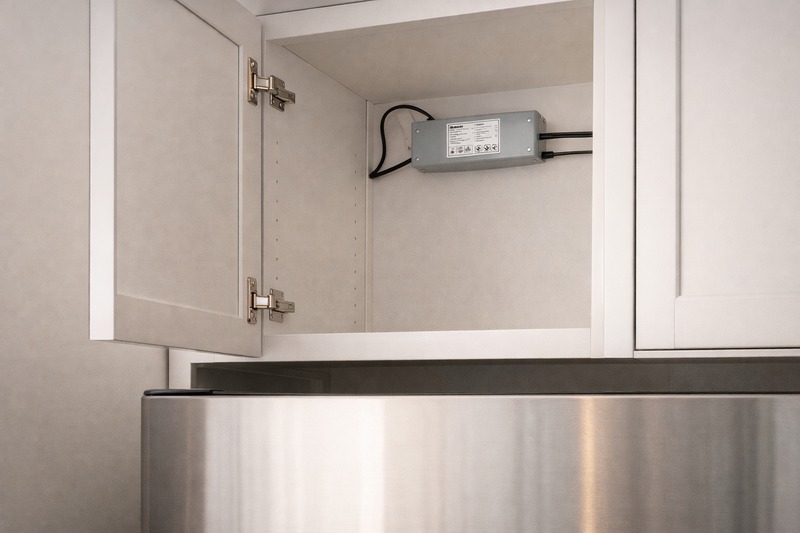
Nothing screams "amateur" like a black power cord dangling from your white cabinets down to the backsplash outlet. Real luxury lighting is invisible until you turn it on.
For a seamless look, use a "Hardwired" dimmable driver hidden inside the cabinet above the microwave or fridge. Run low-voltage wires through the cabinet walls (using a drill) to reach the lights, keeping the backsplash outlets completely free of clutter.
This is the hardest part of the job, and where you might need an electrician.
You have two choices:
- The Plug-in (Easy but Ugly): You plug the power supply into the outlet on the counter. The wire hangs down.
- The Hardwire (Pro method):
I recommend 24V systems over 12V for kitchens. Why? Voltage Drop. You often have to run wire from the fridge (where the driver is hidden) to the sink, then jump the gap to the stove. 12V loses power over these jumps. 24V pushes the current better.
Drilling Tip: When connecting two cabinets separated by a range hood, do not drape the wire over the hood. It gets greasy and hot. Drill a small hole through the side styles of the cabinet frames to pass the wire laterally.
Also, ensure you buy a Triac Dimmable Driver. This allows you to use the standard dimmer switch on your wall to control the under-cabinet lights. If you use a cheap non-dimmable adapter, your kitchen will feel like an operating room at full brightness with no way to dim it down for a romantic dinner.
| Component | DIY Solution | Pro Solution | Why Pro is Better? |
|---|---|---|---|
| Power Source | Plug-in Adapter | Hardwired Driver | No cords on the counter. |
| Connection | Wire Nuts | Wago Connectors | Safer, reusable, tighter. |
| Drilling | Through bottom | Inside the lip | Wires are totally invisible. |
| Dimming | Remote Control | Wall Switch | Remotes get lost; Switches don’t. |
Conclusion
A successful kitchen light install depends on three things: High CRI to make food look good, Mechanical Clips so the lights don’t fall into your soup, and Hidden Wiring for a clean finish. Do not rely on adhesive tape, and prioritize the front-mounting position.
Interested in Our LED Solutions?
Get professional consultation and customized LED lighting solutions for your projects. Contact our expert team today.
Related Articles

How Do You Build Profitable Custom Vehicle and RV Interior LED Rope Lights?
You lose RV installation contracts because your interior lights fail on rough roads. Standard strips show bright dots on glossy…

How to Perfect Bookshelf and Display Cabinet LED Rope Lighting?
You lose retail clients when bookshelves look incredibly dark. Ugly shadows hide expensive products inside display cabinets daily. You need…

How to Master Mirror and Vanity LED Rope Light Installation?
Your clients complain about ugly shadows in their bathroom mirrors. Bad lighting ruins expensive vanity designs. You lose future contracts…
