
What are the Best Design Ideas for Deck & Patio LED Strips?
Your client has a beautiful, expensive deck, but as soon as the sun sets, it becomes a dark, unusable square. Harsh overhead floodlights create blinding glare and kill any sense of atmosphere, making the space feel uninviting.
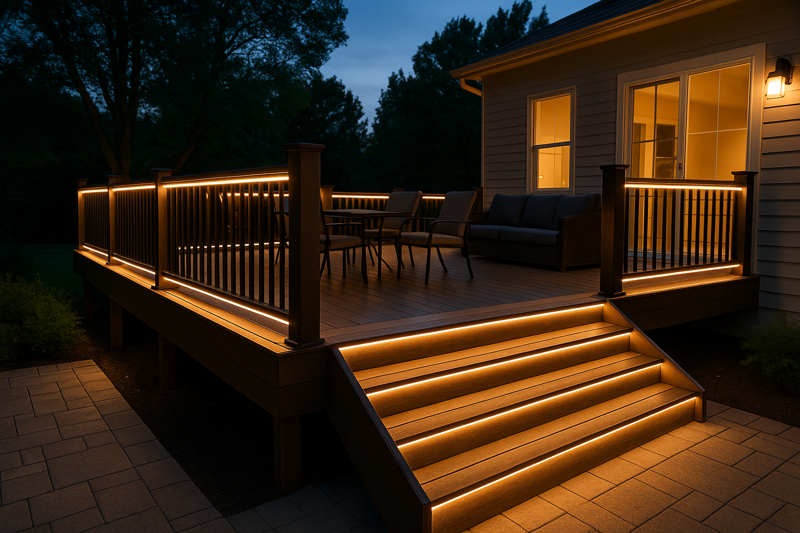
The best designs use indirect lighting. Install strips under railings and stair treads for safety and ambiance. Place them behind benches for a floating effect. Integrate them into pergolas to create a true "outdoor room." These techniques deliver a high-end, resort-like feel.
As the owner of a factory that supplies lighting products to professionals across North America and Japan, I know that your clients aren’t just buying lights—they are buying a lifestyle. A well-lit deck becomes their evening retreat, their entertainment hub. For contractors and designers like my client Tom, presenting these ideas isn’t about upselling a product; it’s about providing a complete, high-value solution. Let’s explore the most impactful designs you can offer.
How Do You Create the Perfect Ambient Glow?
The deck feels like a dark, undefined void at night. A single bright porch light is too harsh and doesn’t illuminate the edges, making it feel smaller than it is.
Install a continuous waterproof LED strip directly underneath the top deck railing. This technique casts a soft, downward glow onto the deck floor, defining the perimeter of the space and creating a warm, inviting ambiance without any direct glare.
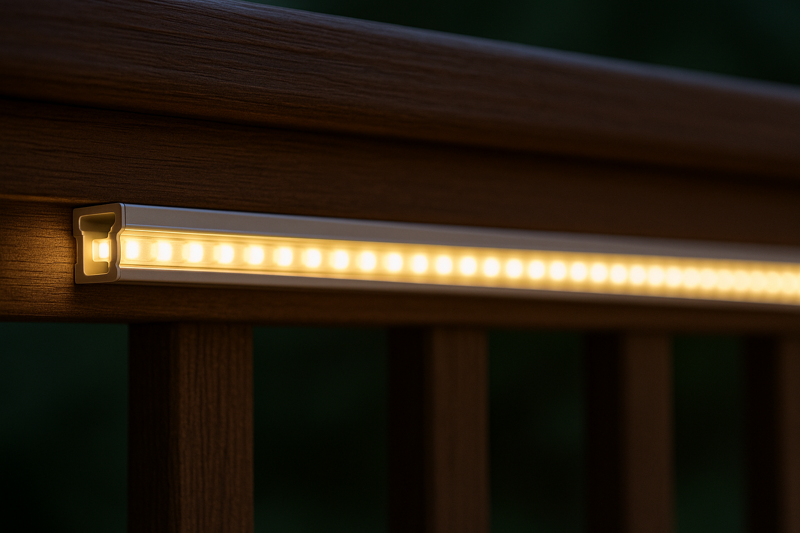
This is the foundational technique for all deck lighting. It is the single most effective way to transform the space. The key is that the light source is hidden. Guests see the beautiful, warm glow on the floor, not a series of distracting bright dots. It makes the deck feel safer, larger, and infinitely more luxurious. I always advise my distributor partners to sell this as the "Essential Deck Lighting Package." For a professional installation, use an aluminum channel to protect the strip and create a perfectly even line of light. It’s a simple, repeatable technique that delivers a premium result every single time and forms the base layer of your lighting design.
Railing Lighting Placement Comparison
The placement of the strip on the railing system dramatically changes the effect.
| Placement | Primary Effect | Best For | Pro Tip |
|---|---|---|---|
| Under the Top Rail1 | Washes the deck floor with indirect light. | 90% of applications. Provides the best balance of ambiance and safety. | This is the go-to professional standard. |
| Under the Bottom Rail | Creates a low-level "runway" or "outline" effect. | Modern, minimalist decks where a subtle accent is desired. | The effect is very subtle and more decorative than functional. |
| On Vertical Posts2 | Accentuates the deck’s structure and architecture. | Decks with unique or decorative posts. | Use a channel to avoid glare and direct sight of the LEDs. |
| Actionable Insight | Always start with the top rail. It provides the most value and is what most clients envision for "deck lighting." |
How Can You Make Your Deck Stairs Both Safe and Stunning?
Stairs are the most dangerous part of a deck at night. A single light at the top or bottom creates long, deceptive shadows on the treads, creating a serious trip hazard.
The safest and most beautiful solution is to install a short piece of LED strip under the "nose" of each individual stair tread. This directly illuminates the tread below, ensuring every step is clearly visible without creating shadows or blinding glare.

This technique turns a safety requirement into a stunning design feature. When you light each step this way, the stairs appear to float on ribbons of light. It’s a high-end look that you see in architectural magazines and luxury homes. From a practical standpoint, it is the absolute best way to light stairs. The light is exactly where you need it, and your eyes never have to look into a bright source. For my OEM clients, we often customize shorter strip lengths specifically for this purpose, as it’s such a high-demand application. A contractor who can execute this flawlessly is demonstrating a high level of skill and can command a higher price for their work.
Stair Lighting: Full Integration
Achieving a clean, professional look requires the right components and technique.
| Aspect | Standard Approach | Professional Approach | Payoff |
|---|---|---|---|
| Placement | A single floodlight aimed at the stairs. | Individual strip under each stair nose. | Eliminates all shadows, creates a floating look. |
| Protection | Exposed LED strip3 stuck to the wood. | Strip housed in a slim aluminum channel4. | Protects from kicks and weather; diffuses light evenly. |
| Wiring | Visible wires running down the side. | Wires are drilled through and hidden within the stair structure. | Creates a seamless, magical effect where the source is a mystery. |
| Key Takeaway | Hiding the wires and using a protective channel is what separates a DIY job from a high-end professional installation. |
What Techniques Create That ‘Floating’ or ‘Designer’ Look?
Your client wants more than just standard lighting. They’ve seen pictures of high-end outdoor spaces and want that "wow" factor, but they don’t know how to describe it.
Create a "floating" effect by installing LED strips under the lip of built-in benches, planters, or the deck’s cantilevered edge. This backlighting technique separates the object from the surface below it with a line of light, adding depth and a touch of magic.
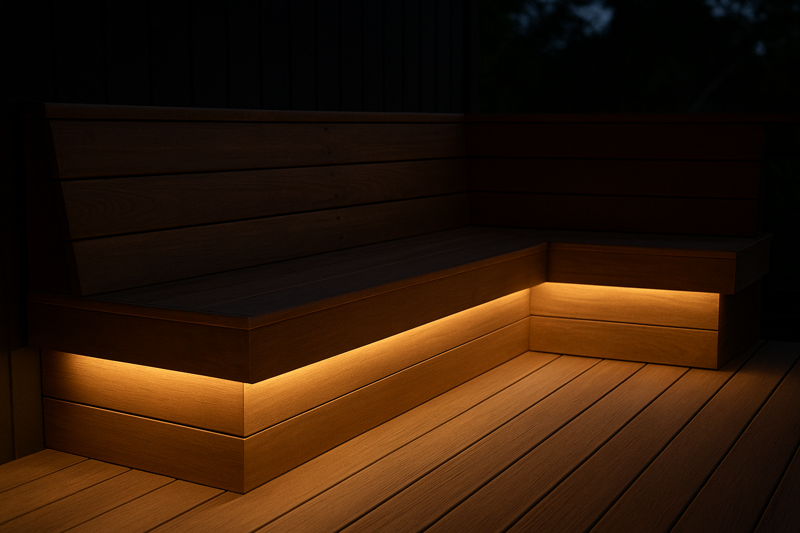
This is where you showcase your design creativity. These techniques are what transform a good lighting job into an award-winning one. The principle is simple: use light to create separation. By placing a strip under the seat of a built-in bench, the heavy structure suddenly looks weightless. The same goes for large, heavy planter boxes. This indirect glow is soft, comfortable, and adds a layer of sophistication. I once worked with a designer in Singapore on a rooftop terrace project. We used this floating effect on all the perimeter seating. The final result was breathtaking and made the entire space feel larger and more open, purely through the strategic placement of light.
Advanced "Floating5" Design Applications
| Application | Placement of Strip | Visual Effect | Why Clients Love It |
|---|---|---|---|
| Built-in Seating6 | Under the seat’s front edge. | The bench appears to hover above the deck floor. | Creates an intimate, lounge-like atmosphere. |
| Planter Boxes | Under the top lip, facing down. | The planters are outlined and seem to float. | Highlights the planter as a feature and washes light on foliage. |
| Cantilevered Deck Edge | On the underside of the overhanging deck. | The entire deck or a section seems to float over the ground. | A very dramatic, high-impact architectural statement. |
| Bar or Countertop | Under the counter’s front overhang. | The heavy countertop looks weightless. | Provides functional light and a modern, social vibe. |
How Do You Light Up Pergolas and Covered Areas?
A deck often includes a pergola, gazebo, or other overhead structure. Left unlit, it’s a dark ceiling. Lit with a single fixture, it feels like an interrogation room.
Integrate LED strips into the structure itself. Run them along the inside of main beams or around the perimeter of the roofline. This provides soft, downward ambient light that makes the covered area feel like a true "outdoor living room."

Lighting the "ceiling" of your outdoor space is crucial for making it feel complete and inviting. The goal is to mimic the soft, ambient light of an indoor room. By hiding strips inside the structural elements of a pergola, you create a source of light that is both everywhere and nowhere. It provides enough illumination for dining or conversation without any harsh glare. This is an application where dimmability is a massive selling point. It allows the client to have bright, functional light when they need it, and a soft, low-level glow when they want to relax. For clients with outdoor kitchens under a covered area, adding a separate run of brighter, task-oriented LED strips under cabinets is a fantastic and highly functional addition.
Overhead Structure Lighting Options
| Structure | Strip Placement | Resulting Atmosphere | Recommended Control |
|---|---|---|---|
| Pergola/Gazebo | Inside the main crossbeams, facing down. | Cozy, room-like, and excellent for dining areas.7 | A dimmer is essential for mood control. |
| Solid Patio Roof | Around the perimeter, where the roof meets the walls. | A "cove lighting" effect that makes the ceiling feel higher. | Simple on/off switch or dimmer. |
| Outdoor Kitchen | Under overhead cabinets. | Bright, focused task lighting for cooking and prep.8 | A separate on/off switch for functional control. |
| Key Insight | Combining perimeter ambient lighting with focused task lighting creates the most versatile and useful covered outdoor space. |
Conclusion
By strategically placing LED strips under rails, stairs, benches, and pergolas, you can transform any deck or patio. These designs add safety, create ambiance, and deliver the high-end look clients want.
-
Explore this link to understand why Under the Top Rail is the preferred choice for deck lighting, balancing ambiance and safety. ↩
-
Discover how lighting on vertical posts can accentuate your deck’s unique features and improve its overall aesthetic. ↩
-
Explore the advantages of LED strip lighting for stairs, including energy efficiency and design flexibility. ↩
-
Learn how an aluminum channel enhances the durability and aesthetics of LED strip lighting installations. ↩
-
Explore how floating designs can enhance aesthetics and functionality in modern architecture. ↩
-
Discover innovative ideas for built-in seating that maximize comfort and style in outdoor areas. ↩
-
Explore how cozy lighting enhances outdoor dining experiences, creating a warm and inviting atmosphere. ↩
-
Learn how effective task lighting can elevate your outdoor cooking experience, ensuring safety and efficiency. ↩
Interested in Our LED Solutions?
Get professional consultation and customized LED lighting solutions for your projects. Contact our expert team today.
Related Articles

How Do You Build Profitable Custom Vehicle and RV Interior LED Rope Lights?
You lose RV installation contracts because your interior lights fail on rough roads. Standard strips show bright dots on glossy…

How to Perfect Bookshelf and Display Cabinet LED Rope Lighting?
You lose retail clients when bookshelves look incredibly dark. Ugly shadows hide expensive products inside display cabinets daily. You need…

How to Master Mirror and Vanity LED Rope Light Installation?
Your clients complain about ugly shadows in their bathroom mirrors. Bad lighting ruins expensive vanity designs. You lose future contracts…
