
How Do You Power Outdoor LED Strip Lights Correctly?
Your outdoor lighting project fails, and the client is upset. The issue is often a mismatched power supply, ruining an otherwise perfect installation. Let’s get the fundamentals right.
Choose the correct voltage (usually 24V for longer runs) for your LED strip. Calculate the total wattage needed by multiplying the strip’s length by its watts per meter. Then, select a waterproof power supply with at least 20% more capacity than your total calculated wattage.
This sounds straightforward, but overlooking one detail can cause major headaches. I’ve consulted on countless projects in North America where designers specified the best strips but overlooked the power source. As a factory owner, I want to share the practical knowledge that separates a project that lasts from one that requires costly callbacks. Let’s break down the critical elements you need to master.
How Does Voltage Drop Affect Long Outdoor LED Strips?
You installed a long run of beautiful outdoor lighting. But the end of the strip is noticeably dimmer than the beginning. This uneven lighting makes the whole project look unprofessional.
Voltage drop is the gradual loss of voltage along a wire’s length. For LED strips, this results in the LEDs farthest from the power source being dim. Using 24V strips and thicker gauge wires helps reduce this effect significantly over long distances.
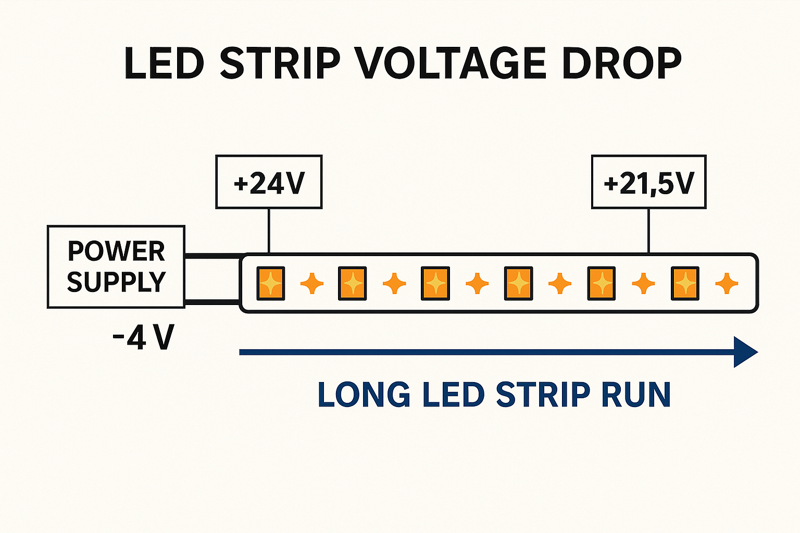
Voltage drop is a simple matter of physics, but it’s a huge pain point for lighting installers. Think of electricity like water pressure in a hose. The farther the water travels, the lower the pressure gets. The same happens with voltage. This problem is much worse with low-voltage DC systems, like the ones used for LED strips. When I work with clients like Tom in the United States on large architectural projects, this is my first area of concern. A 5-meter run of a 12V strip might look fine. But try to power a 15-meter run from one end, and you will see a big problem. The LEDs at the 15-meter mark will be dim and might even have a color shift. This is why we almost always recommend 24V for outdoor projects.
Key Factors in Managing Voltage Drop1
To ensure even brightness, you must consider these factors before an installation. This planning saves time and money.
| Factor | 12V Systems | 24V Systems | Recommendation for Outdoor |
|---|---|---|---|
| Max Run Length | Shorter (typically ~5 meters) | Longer (typically ~10-15 meters) | Prefer 24V for any run over 5 meters |
| Current Draw | Higher (I=P/V) | Lower (I=P/V) | Lower current means less heat and less voltage drop |
| Wire Gauge2 | Requires thicker, more expensive wire for longer runs | Can use thinner, standard wire for longer runs | Plan for the correct wire gauge from the start |
| System Efficiency | Less efficient due to higher energy loss as heat | More efficient with less energy lost | Higher efficiency is always better for reliability |
For very long outdoor installations, you might need to power the strip from the middle or from both ends. This ensures the distance from the power source to any LED is minimized.
Why is a Waterproof Power Supply Non-Negotiable for Outdoor Setups?
You installed a great outdoor lighting system. It works perfectly, but after the first big storm, it’s dead. The culprit is often a power supply not rated for outdoor conditions.
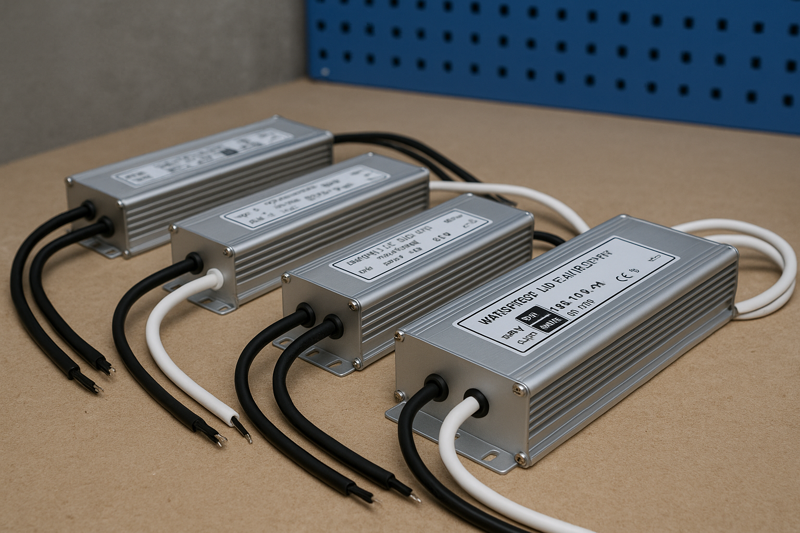
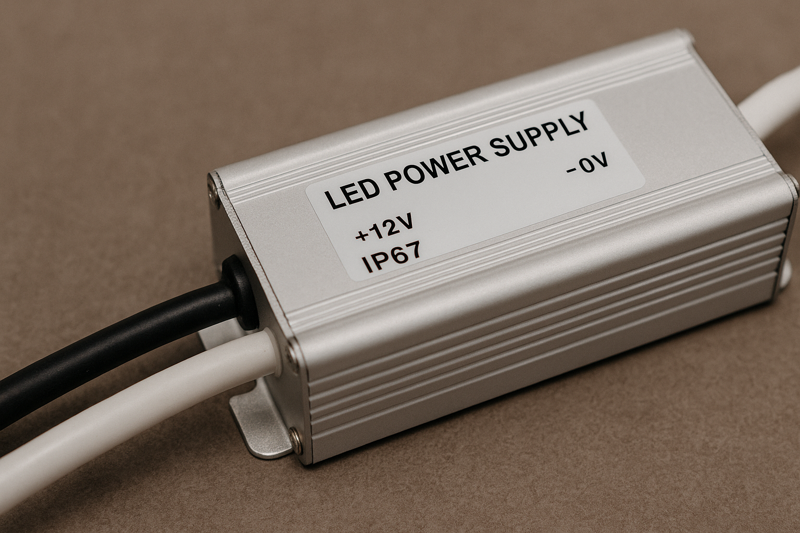
A waterproof power supply (rated IP67 or higher) is essential for outdoor use. It protects the internal electronics from rain, humidity, and dust. This prevents short circuits and ensures the safety and longevity of the entire lighting system.
I can’t stress this enough: never use an indoor power supply outdoors. I once had a new distributor from the US, trying to cut costs, pair our premium IP67 LED strips with a cheap, non-waterproof power brick. They put it in a "weatherproof" box, but condensation still got in. The result was a complete system failure across a multi-unit residential project. It was a costly lesson for them about false economies. A true outdoor power supply, often called a driver, is a completely sealed unit. There are no ventilation holes for water or insects to get inside. The input and output cables are sealed with gaskets. This robust construction is the only way to guarantee performance year after year in harsh weather, from the summer humidity of Florida to the snowy winters of Colorado.
Indoor vs. Outdoor Power Supply Features
The differences are not just cosmetic; they relate directly to safety and reliability. Choosing the right one is critical.
| Feature | Indoor Power Supply (e.g., IP20)3 | Outdoor Power Supply (e.g., IP67)4 | Why It Matters for Outdoor Use |
|---|---|---|---|
| Enclosure | Perforated metal or plastic for ventilation | Fully sealed aluminum or plastic case | Prevents moisture and dust from entering and causing damage. |
| Cooling | Relies on air circulation (fans or vents) | Uses the case as a heatsink (passive cooling) | No openings mean no entry points for water. |
| Cabling | Screw terminals for open wiring | Sealed, hardwired cables | Pre-sealed cables eliminate a common failure point. |
| Durability | Designed for stable indoor environments | Built to withstand temperature swings, UV exposure, and moisture | Longevity and reliability in changing weather conditions. |
When you source from my factory, Rhstriplighting, we always confirm the installation environment. This is to ensure we supply a complete, reliable system, not just a product.
How Do You Calculate the Right Power Supply Size for Your Project?
You bought a power supply you thought was big enough. But when you connect your LED strips, it overheats or shuts down. This happens when you don’t calculate wattage correctly.
To size your power supply, first find the total wattage of your LED strip. Multiply the length (in meters/feet) by the strip’s power rating (watts per meter/foot). Then, add a 20% safety margin. This ensures the power supply doesn’t run at full capacity.

This calculation is the most important piece of math you will do for any lighting project. Forgetting the 20% "headroom" is a rookie mistake I see all the time. Power supplies are most efficient and reliable when they are not stressed. Running a 100W power supply for a 98W load will cause it to run hot and fail prematurely. It’s like running a car engine at its redline all the time. It won’t last. By giving it a 20% buffer, you ensure it runs coolly and lasts for its full expected lifespan. This also gives you a small amount of flexibility if you need to add a short extra segment of strip light later. It is a simple step that protects your investment and your reputation.
Step-by-Step Power Calculation Guide
Let’s use a real-world example: A 12-meter outdoor patio project.
| Step | Action | Example Calculation | Result |
|---|---|---|---|
| 1. Identify Strip Wattage | Find the watts per meter from the product spec sheet. | Let’s say our strip uses 14.4 W/m. | 14.4 W/m |
| 2. Calculate Total Load | Multiply the strip length by its watts per meter. | 12 meters * 14.4 W/m1 | 172.8 Watts |
| 3. Add Safety Margin | Multiply the total load by 1.2 (which adds 20%). | 172.8 W * 1.2 | 207.36 Watts2 |
| 4. Select Power Supply | Choose the next standard-size power supply above your final number. | Common sizes are 150W, 200W, 250W. | Select a 250W power supply. |
Following this simple process will lead you to the correct choice every time. Don’t just guess; doing the math takes 30 seconds and prevents major problems down the line.
Conclusion
Properly powering outdoor LED strips requires choosing 24V for long runs, using an IP67 waterproof driver, and adding a 20% wattage buffer. Get these right for a lasting installation.
-
Understanding Voltage Drop is crucial for ensuring efficient electrical installations and preventing issues like dim lighting. ↩ ↩
-
Exploring Wire Gauge helps you choose the right thickness for your projects, ensuring safety and efficiency. ↩ ↩
-
This resource will guide you through essential features of indoor power supplies, ensuring optimal performance and safety. ↩
-
Explore this link to understand how outdoor power supplies enhance safety and reliability in various environments. ↩
Interested in Our LED Solutions?
Get professional consultation and customized LED lighting solutions for your projects. Contact our expert team today.
Related Articles

How Do You Build Profitable Custom Vehicle and RV Interior LED Rope Lights?
You lose RV installation contracts because your interior lights fail on rough roads. Standard strips show bright dots on glossy…

How to Perfect Bookshelf and Display Cabinet LED Rope Lighting?
You lose retail clients when bookshelves look incredibly dark. Ugly shadows hide expensive products inside display cabinets daily. You need…

How to Master Mirror and Vanity LED Rope Light Installation?
Your clients complain about ugly shadows in their bathroom mirrors. Bad lighting ruins expensive vanity designs. You lose future contracts…
