
How Do You Properly Mount LED Strips on Different Surfaces?
The design is flawless, and the lighting is perfect. But a month later, you get the dreaded call: “The lights are falling down.” A simple mounting failure has now ruined a beautiful installation and your professional reputation.
To properly mount LED strips, I always begin with a clean, dry, and stable surface. For most smooth and sealed surfaces, the pre-applied 3M adhesive is often enough after proper cleaning. For porous, rough, or difficult surfaces like raw wood, concrete, brick, or some plastics, I treat aluminum mounting channels, clips, primers, or mechanical fixing as the safer professional solution.
Here at the factory, we invest heavily in sourcing authentic 3M VHB adhesive tape for our premium strips. We know it is one of the best options in the business. However, even the world’s best adhesive will fail if it is applied to a dusty, oily, damp, weak, or porous surface. The one piece of feedback I consistently get from my most successful clients—the ones who never get callbacks—is that they spend more time preparing the surface than they do actually sticking the strip on. This guide covers the best practices they use, and it also explains how I think about wood, drywall, metal, concrete, brick, and plastic as very different mounting environments.
Why is Surface Preparation the Most Critical First Step?
You rush to finish a job, peeling and sticking the strip directly onto a newly painted wall. A week later, half the strip is dangling. Your adhesive tape has pulled the paint, not adhered to the wall.
Proper surface preparation ensures the adhesive forms a permanent bond with the actual substrate, not with a layer of dust, oil, loose paint, or trapped moisture. This step is non-negotiable for a professional, long-lasting installation and the prevention of bond failure.
The bond between the adhesive tape and the surface is a chemical bond that happens on a microscopic level. It relies on maximizing the “surface energy”—the ability of the adhesive to wet out and grip the material. Any contaminant, no matter how small, acts as a barrier that prevents this bond from forming correctly. This is not just theory. It is the practical difference between an installation that lasts for years and one that fails in a month. If the strip is already showing lift at the ends or corners, it also helps to read How Do You Securely Mount Outdoor LED Strip Lights? before the problem gets worse.
I tell my clients to treat this step as the foundation of their work. If the foundation is weak, everything built upon it will eventually fail. This matters on every surface, but it becomes even more important when I work on rough, porous, outdoor-facing, or low-energy materials.
The “Clean, Dry, Test” Protocol
Before I ever peel the liner off the back of an LED strip, I follow a simple but mandatory protocol. This process removes the three main enemies of a good adhesive bond: dust, oils, and moisture1.
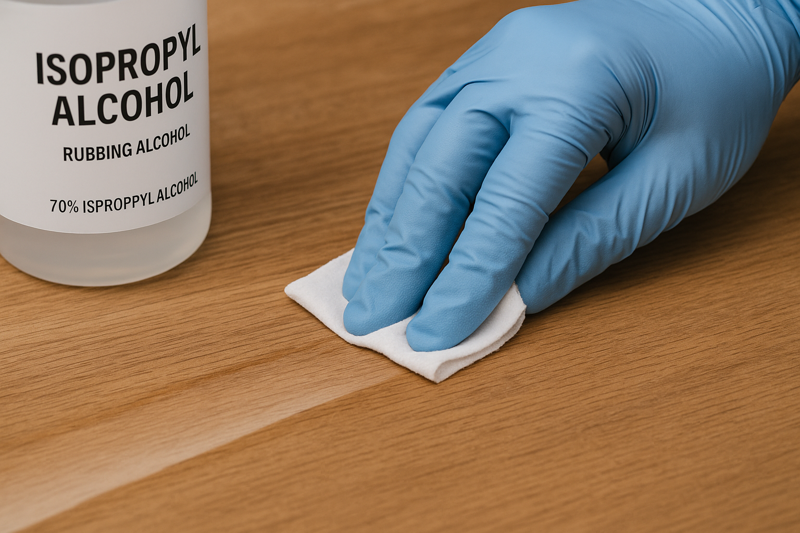
- Clean with Isopropyl Alcohol (IPA)2: I use a clean, lint-free cloth and dampen it with isopropyl alcohol. I do not use household cleaners, because many of them leave behind silicones or detergent residues that reduce adhesion.
- Ensure a Completely Dry Surface: The alcohol evaporates quickly, but I still give it time. If the environment is humid, this matters even more.
- Test the Bond if Needed: On an unfamiliar surface, I may test a small area first. This is especially useful for coated surfaces, painted walls, plastics, and uncertain finishes.
The Science of Why This Works
This is not just about being tidy. It is about chemistry and physics.
- Dust and debris: These are physical barriers. The tape sticks to the dust, not the wall.
- Oils and grease: These are chemical barriers. They create a low-surface-energy film that adhesive cannot properly grip.
- Moisture: This weakens the bond and interferes with curing.
- Porousness: Raw wood, rough plaster, concrete, and brick reduce effective contact and may weaken the adhesive system.
- Weak coatings: Fresh or low-quality paint can fail before the tape does.
| Preparation Step | Purpose | Common Mistake to Avoid |
|---|---|---|
| 1. Clean with IPA | Removes oils, dust, and contaminants. Increases surface energy3. | Using household cleaners that leave a residue. |
| 2. Ensure Completely Dry | Prevents moisture from interfering with the adhesive cure. | Rushing the job and not allowing the solvent to fully evaporate. |
| 3. Test the Bond | Confirms how the tape behaves on an uncertain surface. | Assuming all painted, plastic, or coated surfaces behave the same way. |
| 4. Firm Pressure | Activates the pressure-sensitive adhesive4 for a full bond. | Lightly pressing the strip on instead of applying firm, even pressure. |
| 5. Allow to Cure | Gives the adhesive time to build to its maximum bond strength. | Putting stress on the strip immediately after mounting. |
What is the Best Way to Mount LED Strips on Wood, Drywall, or Painted Surfaces?
Your client wants seamless accent lighting on a custom-built wooden bookshelf, under a cabinet, or in a painted drywall cove. The surface seems smooth, but you worry about the long-term hold of just using the tape.
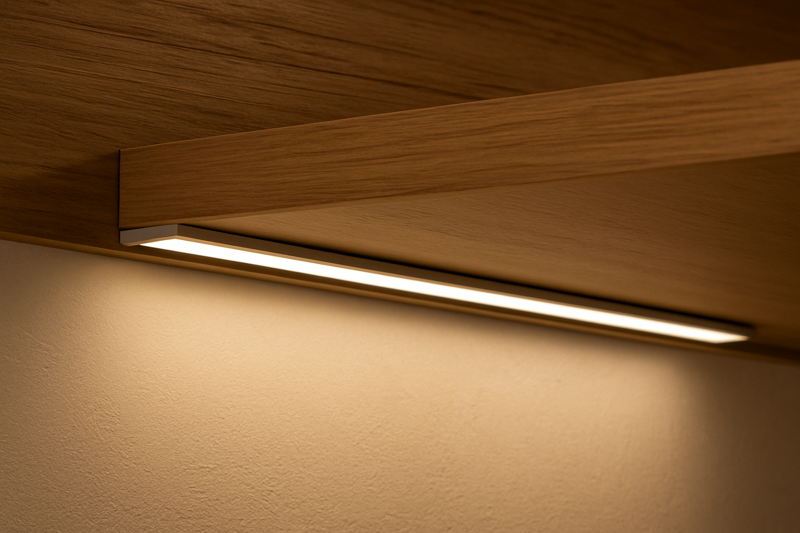
For smooth, sealed, painted, and fully cured surfaces, proper cleaning followed by the strip’s 3M adhesive is often effective. For unsealed, porous, chalky, rough, or textured surfaces like raw wood, weak drywall paint, or rough plaster, I recommend using an aluminum mounting channel for a more secure and professional result.
Wood and drywall are some of the most common installation surfaces, and they are also where I see the most variation in real results. The key difference is not only the material itself. It is the finish. A smooth, glossy, fully cured painted surface is very different from a dusty matte wall. A sealed wood shelf is very different from raw pine. A well-finished cabinet panel is very different from a rough wooden beam. When I choose the right mounting method, I focus on finish, texture, strength, and long-term stability.
Direct Adhesion Method for Ideal Surfaces
This method only works on ideal surfaces: sealed and stained wood, wood with a polyurethane coating, or drywall painted with a satin or semi-gloss finish that has had enough time to cure fully.
- Prepare the Surface: I follow the clean, dry, test protocol with isopropyl alcohol.
- Plan the Run: I lightly mark a straight guideline.
- Apply the Strip Carefully: I peel back only a small section of the liner at a time.
- Apply Firm, Even Pressure: This is critical. Pressure-sensitive adhesive5 needs real pressure to build bond strength.
- Allow Cure Time: I let the bond build before I place any stress on the strip.
Why Raw Wood and Weak Wall Finishes Are Risky
Raw wood often contains fine dust and has open grain. It may absorb part of the adhesive effect and reduce contact quality. Drywall can also be risky when the paint is weak, chalky, textured, or not fully cured. In those cases, the tape may adhere to the finish layer, but the finish itself may detach from the wall. Then the strip falls and takes part of the surface with it.
This is why I do not judge wood and drywall by appearance alone. A surface that looks smooth may still be weak. A painted surface that looks ready may still be curing. If the wall finish is decorative, uneven, or heavily textured, I also recommend reading How Do You Properly Hang LED Strip Lights on Textured Walls? before choosing the final fixing method.
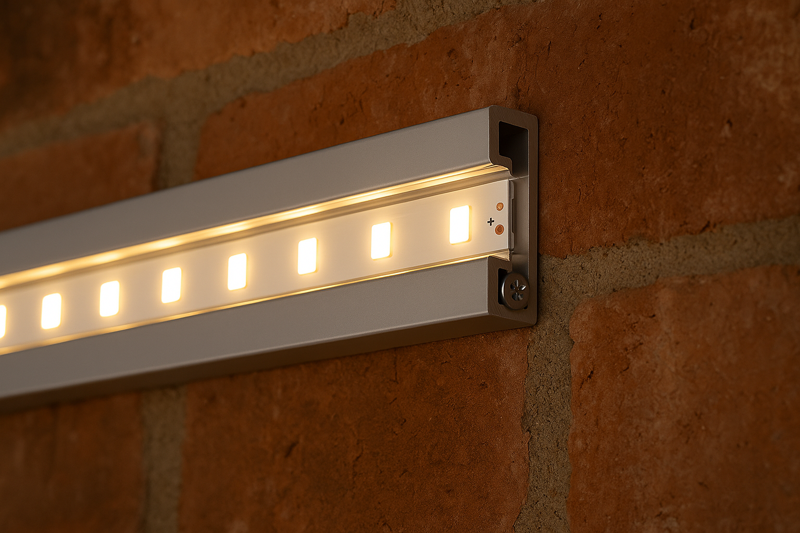
Aluminum Mounting Channels as the Professional Standard
For any surface that is not perfectly smooth, sealed, and clean—or for any project where long-term reliability matters most—I recommend channels.
- Mechanical Fastening6: The channel itself is secured to the substrate with screws or clips.
- A Better Adhesive Base: The strip then bonds to the smooth aluminum channel, not directly to the difficult surface.
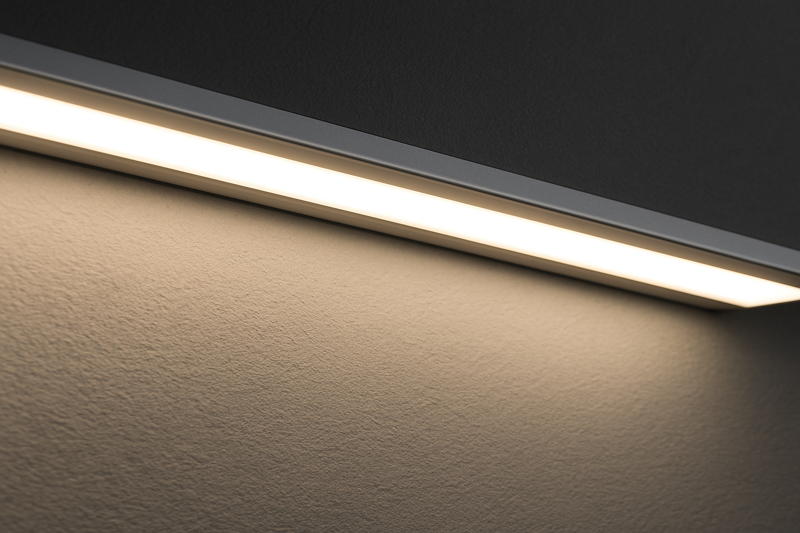
- Heat Dissipation7: Aluminum helps pull heat away from the strip.
- Light Diffusion8: A diffuser cover improves the visual finish and removes LED dot hotspots.
- Protection: The strip is protected from dust, accidental impact, and handling.
My Practical View on Wood and Wall Surfaces
If the surface is smooth, sealed, stable, and cured, direct adhesion can work very well. If the surface is raw, dusty, weak, textured, or high-risk, I stop trusting tape alone and move to a channel. That decision usually prevents the callback that ruins the job.
| Surface Type | Can Direct Adhesion Work? | When I Prefer a Channel | Main Risk |
|---|---|---|---|
| Sealed smooth wood | Yes | Long visible runs, premium work | Movement over time |
| Raw or unfinished wood | Rarely | Almost always | Dust, porosity, moisture |
| Smooth cured painted drywall | Yes | Premium or long-term jobs | Paint layer failure |
| Textured wall or rough plaster | Rarely | Almost always | Low contact area |
How Do You Securely Mount LED Strips on Metal Surfaces?
You are installing task lighting under steel cabinets or creating an accent on an aluminum frame. You know metal is a great surface for adhesion, but you are concerned about heat, safety, and long-term reliability.
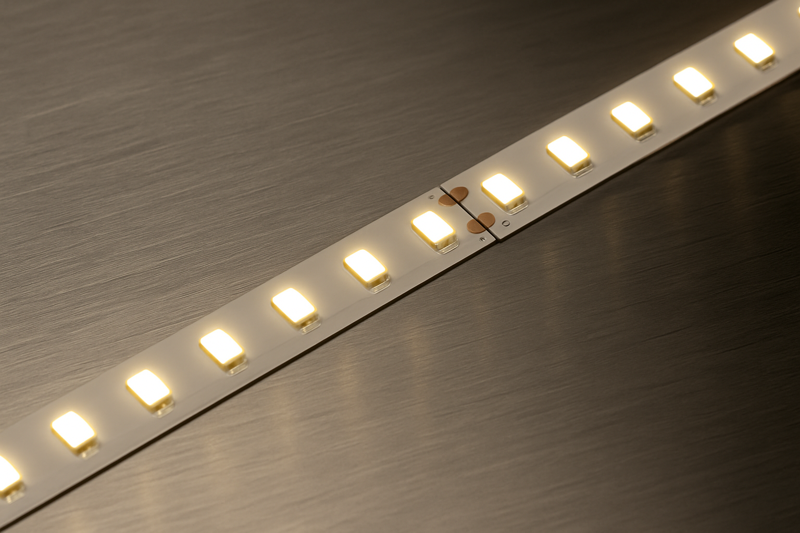
Metal is one of the best surfaces for mounting LED strips. It provides a strong bond for adhesive and also acts as an excellent heat sink. The key is to make sure the surface is clean and that no exposed solder points on the strip can touch the conductive surface and create a short circuit.
Metal is, in many ways, the ideal mounting surface for an LED strip. It is non-porous, smooth, and if clean, it provides excellent contact for the adhesive. More importantly, heat is one of the main enemies of LED lifespan. Metal helps by pulling heat away from the PCB and dissipating it into the surrounding structure. That can improve strip performance and longevity. Still, metal has one special concern that wood and drywall do not have: electrical conductivity.
The Risk of Short Circuits
The back of a flexible LED strip is non-conductive, so I can generally mount it directly onto a clean metal surface. The risk comes from the solder points9. If an exposed solder point touches the metal surface in the wrong way, it can create a short circuit. That can trip the power supply protection or damage part of the system.
How I Reduce the Risk
- Inspect the Strip: I check for rough or raised solder points.
- Smooth or Rework if Needed: If solder is too proud, I correct it before installation.
- Use Kapton Tape10 if Needed: Under exposed joints or custom soldered points, I may place a small piece of insulating tape on the metal.
- Use Channels for Premium Work: Channels offer many of the same heat-sinking benefits while adding a physical barrier and a cleaner finish.
Maximizing Thermal Performance
On metal, cleaning improves both adhesion and thermal transfer11. Dirt and oil do not only weaken the tape. They also create a thermal barrier. So I apply the strip with firm pressure and avoid trapped air gaps where possible. For very high-power strips, I may consider more specialized thermal strategies, but for most commercial and architectural projects, a clean metal base12 or an aluminum channel already gives excellent results.
My View on Metal as a Mounting Surface
Metal is often the easiest surface to trust, but I still treat it with discipline. If the installation includes joints, extensions, or extra feed sections, my guide on How Do You Connect and Extend Outdoor LED Strips? is the right next step after mounting.
I clean it well, inspect the strip, and pay attention to solder points. A strong surface still needs a professional method.
| Metal Condition | Direct Adhesion Suitability | Extra Step I Recommend | Main Concern |
|---|---|---|---|
| Clean brushed aluminum | High | Inspect solder points | Short risk at joins |
| Painted metal frame | Medium to High | Check coating quality | Adhesion depends on coating |
| Steel cabinet underside | High | Clean and press firmly | Heat and residue |
| Outdoor metal frame | Medium | Add support or channel | Heat cycles and weather |
What Is the Best Way to Mount LED Strips on Concrete, Brick, and Masonry?
Your project involves a polished concrete floor accent, a brick feature wall, or a rugged commercial installation. The standard peel-and-stick approach feels fast, but deep down, you know it is risky.
For rough, porous surfaces like concrete, brick, and masonry, aluminum channels with robust mechanical fasteners are the only truly reliable option. I do not trust adhesive-only mounting on these surfaces for professional work.
As an installer, difficult surfaces are where real judgment matters. Anyone can stick a strip onto clean aluminum. Making it work on brick or concrete requires a different mindset. These materials are rough, dusty, porous, and uneven. This is where I stop relying on adhesive chemistry alone and switch to mechanical fastening.
Why Direct Adhesion Usually Fails on Masonry
Concrete and brick rarely offer enough consistent contact area. Dust sits in the pores. The surface is uneven. Even if the tape grabs in some places, it will not support the strip evenly across the whole run. This leads to sagging, peeling, or partial detachment.
The Method I Trust
- Choose a Suitable Channel or Mounting Base
- Mark the Run Carefully
- Drill Pilot Holes with the Correct Bit
- Insert Anchors Where Required
- Screw-Mount the Channel or Clips
- Install the Strip into the Smooth Mounted Base
This process takes longer, but it changes the installation from a weak adhesive gamble into a controlled structural solution. For exterior runs, I also like to confirm the product requirements early, so it helps to review What Should You Look For in an Outdoor LED Strip Light? before final product selection.
Why Channels Matter So Much Here
On concrete or brick, the channel is not just a visual upgrade. It is the real mounting surface. It creates a straight, stable, clean line where the strip can bond properly. Without that stable base, the adhesive is being asked to solve a problem it was never meant to solve.
My Practical Rule for Masonry
If the surface is brick, concrete, cement render, or anything similar, I do not waste time testing direct adhesion for a serious project. I move to a mechanically fixed channel. That is the professional move.
| Masonry Surface | Direct Adhesion Suitability | Best Practice | Main Risk |
|---|---|---|---|
| Smooth sealed concrete | Low | Channel + screws | Weak long-term hold |
| Rough concrete | Very Low | Mechanical fixing only | Poor contact area |
| Brick wall | Very Low | Channel + anchors | Uneven surface |
| Cement render | Low | Channel or heavy-duty clips | Dust and texture |
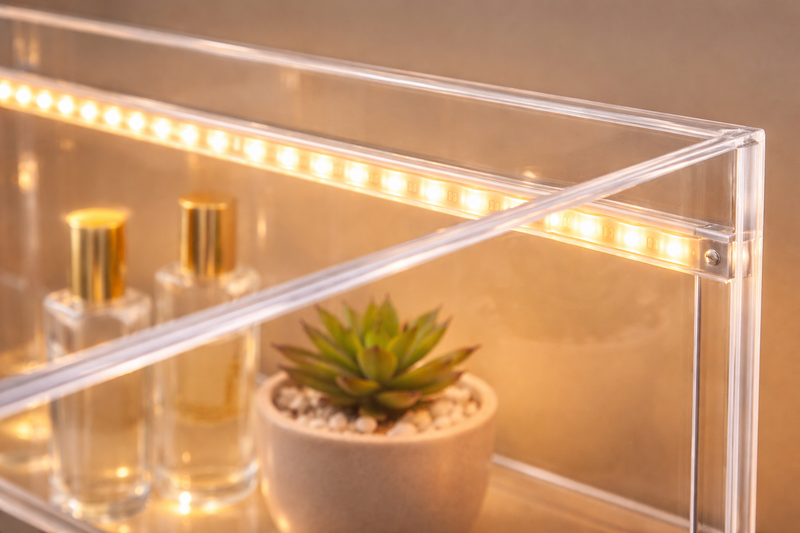
How Do You Mount LED Strips on Plastics Like ABS, Acrylic, or Polycarbonate?
You want to add light to a plastic display case, acrylic panel, or equipment cover. The surface looks smooth, so it should be easy, right? Not always.
Many plastics are low-surface-energy materials, which means adhesives often struggle to grip them properly. On plastics like ABS, acrylic, or polycarbonate, I clean first, then decide whether I need light abrasion, an adhesion promoter, silicone support, or a separate mounting structure.
Plastics are different from brick and concrete, but they can still be difficult. The issue is not roughness alone. It is also surface chemistry. Some plastics resist adhesives more than many installers expect. That is why one plastic project may work perfectly while another fails, even when both looked smooth on day one.
Why Plastics Can Be Difficult
Low-surface-energy plastics do not let adhesive spread and bond as easily as metal or sealed painted surfaces. So even high-quality tape may not reach full strength. That is why normal tape methods can become unreliable on some display materials, covers, housings, and fabricated plastic parts.
The Professional Solutions I Use
- Surface Preparation: As always, I start with isopropyl alcohol.
- Light Abrasion if Appropriate: On some hard plastics, very light abrasion can help the tape grip better.
- Adhesion Promoter: A product such as 3M Primer 94 can greatly improve bond strength.
- Silicone Adhesive Support: In some projects, I add small amounts of clear silicone adhesive for flexible long-term support.
- Move to a Separate Base if Needed: If the plastic is too risky, I use a channel or secondary mounting structure instead.
When I Upgrade the Method
If the plastic is expensive, the project is visible, the environment is warm, or vibration is present, I get more conservative. That is where primer, silicone, or a separate base becomes the smarter choice.
My View on Plastic Mounting
Plastic is never a surface I treat casually. I test, judge, and upgrade the method when needed. A smooth plastic surface can still be a weak mounting surface.
| Plastic Type / Condition | Direct Adhesion Suitability | Better Support Option | Main Risk |
|---|---|---|---|
| Clean acrylic display surface | Medium | Primer if needed | Low surface energy |
| ABS housing | Medium to Low | Primer or silicone support | Weak long-term bond |
| Polycarbonate panel | Medium | Test first, then support | Variable adhesion |
| Outdoor plastic part | Low to Medium | Silicone + support or channel | Temperature and movement |
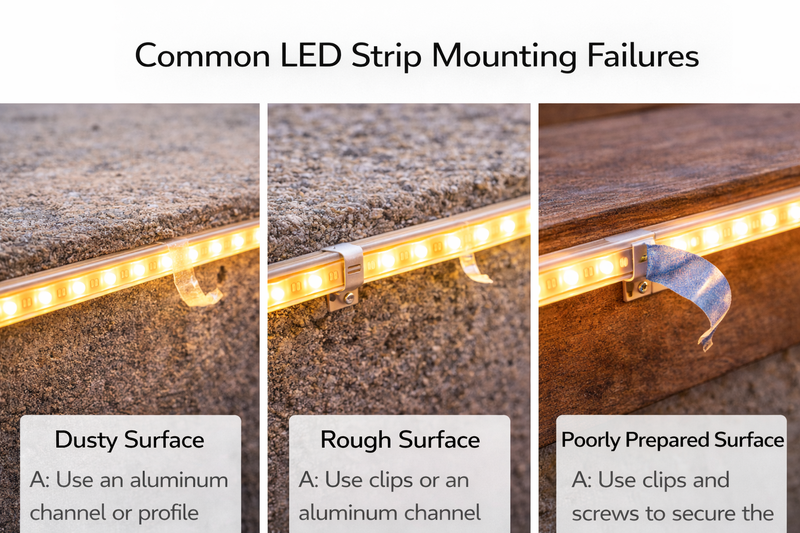
What Common Mistakes Cause LED Strip Mounting Failure?
The strip rarely falls because of a mystery problem. In most cases, the real issue is that the wrong mounting method was used on the wrong surface.
The most common mounting mistakes are poor surface cleaning, relying on adhesive alone on rough materials, ignoring cure time, letting wire tension pull on the strip, and assuming every surface behaves the same way.
I see these mistakes over and over again, and they are usually avoidable. A failed install often starts with a small shortcut that did not look dangerous at the time.
The Most Common Errors
- Using adhesive alone on concrete, brick, or rough wood
- Skipping IPA cleaning
- Mounting on fresh or weak paint
- Ignoring low-surface-energy plastics
- Allowing wire tension to pull on the strip
- Stressing the strip before the adhesive has cured
- Treating all surfaces the same way
| Common Mistake | Why It Fails | Better Solution |
|---|---|---|
| Adhesive-only on rough surfaces | Too little contact area | Use channel or clips |
| Dirty or oily substrate | Tape bonds to contamination | Clean with IPA |
| No cure time | Bond never reaches full strength | Wait before stressing strip |
| Wire pulling on strip | Localized mechanical stress | Support wires separately |
| Same method for all materials | Wrong method for the surface | Match method to substrate |
My Practical Summary
Good mounting is not luck. It is good judgment. When I remove these common mistakes, I remove most future complaints too.
What Mounting Method Works Best for Each Surface Type?
At some point, every installer wants a simple rule. Which surfaces can I trust with direct adhesive, and which surfaces need more?
Smooth, sealed, stable surfaces usually allow direct adhesive mounting. Rough, porous, low-energy, outdoor-facing, or unstable surfaces usually need channels, clips, primers, or mechanical fixing.
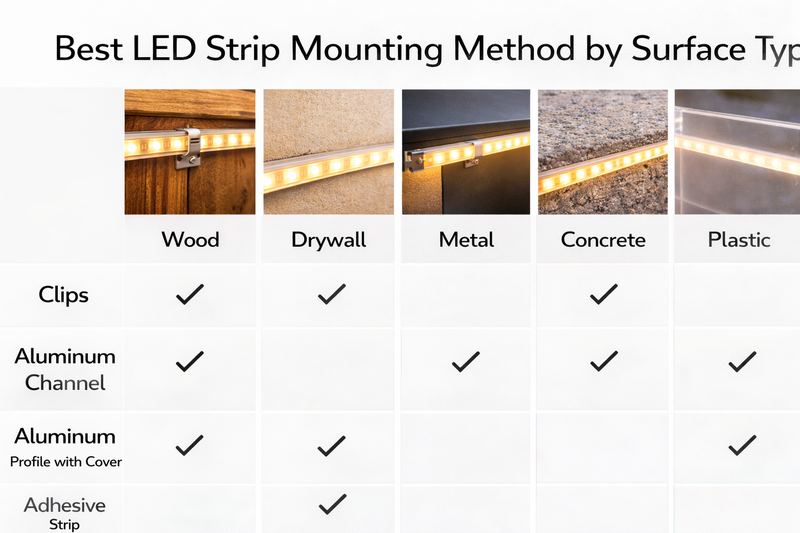
This is the quick decision guide I wish more installers used before starting a project.
| Surface Type | Can Adhesive Work? | When a Channel or Added Support Is Better | Main Risk |
|---|---|---|---|
| Sealed wood | Yes | Long runs, premium jobs, visible strips | Movement over time |
| Raw wood | Rarely | Almost always | Porosity and dust |
| Smooth cured painted wall | Yes | Long-term or high-end work | Paint layer weakness |
| Textured drywall/plaster | Rarely | Almost always | Low contact area |
| Clean metal | Usually yes | Visible or high-power runs | Heat and solder risk |
| Concrete / brick | No, not reliably | Always | Roughness and porosity |
| ABS / acrylic / plastic | Sometimes | When adhesion is uncertain | Low surface energy |
How I Use This in Real Work
If the surface is ideal and the project is low-risk, direct mounting can be efficient and clean. If the surface is uncertain, visible, rough, premium, or exposed, I move to a more secure method. That is not overcomplicating the job. It is controlling risk before the failure happens.
FAQ
Small mounting questions often point to bigger installation problems.
The right answer depends on the surface finish, the project type, and how much long-term stress the strip will face.
Can I stick LED strips directly to drywall?
Yes, but only if the drywall has a smooth, fully cured, and stable painted finish. On rough, weak, or dusty drywall, I prefer a channel.
Do LED strips stick well to metal?
Usually yes. Clean metal is one of the best direct-mount surfaces. I still inspect solder points and clean carefully first.
Why do LED strips fall off wood surfaces?
They often fail because the wood is raw, dusty, absorbent, or moving with moisture. Sealed wood performs much better than unfinished wood.
Is an aluminum channel necessary for concrete walls?
For most professional work, yes. Concrete and brick are poor direct-adhesion surfaces, so channels or mechanical fixing are the safer long-term solution.
Can I mount LED strips on plastic without primer?
Sometimes, but not always reliably. On difficult plastics, primer or added support is usually the better choice.
How long should I let the adhesive cure before use?
I prefer to allow at least 24 hours before putting stress on the strip.
Conclusion
The quality of my mounting work is a direct reflection of my professionalism. By properly preparing the surface and choosing the right method—whether direct adhesion, channels, primers, or mechanical fastening—I make sure the installation is built to last.
If I need LED strip lights with authentic 3M adhesive, project-ready mounting advice, or OEM support for demanding applications, I can guide readers to explore more solutions at Rhstriplighting. For buyers comparing products for exposed installations, What Should You Look For in an Outdoor LED Strip Light? is also a useful next step.
-
Learn about the impact of moisture on adhesive bonds to ensure optimal results in your projects. ↩
-
Explore the uses of IPA in adhesive applications to understand its importance in ensuring strong bonds. ↩
-
Discover the concept of surface energy and its critical role in achieving effective adhesive bonds. ↩
-
Gain insights into pressure-sensitive adhesives and how they create strong bonds under pressure. ↩
-
Understanding pressure-sensitive adhesives can enhance your application techniques and ensure better results. ↩
-
Explore the advantages of mechanical fastening to improve the durability and reliability of your projects. ↩
-
Learn about heat dissipation in aluminum to optimize your designs and prevent overheating issues. ↩
-
Discover how light diffusion enhances LED lighting quality and aesthetics for your projects. ↩
-
Understanding solder points is crucial for preventing short circuits and ensuring safe LED strip installations. ↩
-
Explore how Kapton Tape can enhance your electronic projects by providing insulation and protection against short circuits. ↩
-
Learn about thermal transfer to optimize your LED strip installations for better performance and longevity. ↩
-
Discover the significance of a clean metal base in ensuring strong adhesion and effective thermal performance for LED strips. ↩
Interested in Our LED Solutions?
Get professional consultation and customized LED lighting solutions for your projects. Contact our expert team today.
Related Articles

How Do You Build Profitable Custom Vehicle and RV Interior LED Rope Lights?
You lose RV installation contracts because your interior lights fail on rough roads. Standard strips show bright dots on glossy…

How to Perfect Bookshelf and Display Cabinet LED Rope Lighting?
You lose retail clients when bookshelves look incredibly dark. Ugly shadows hide expensive products inside display cabinets daily. You need…

How to Master Mirror and Vanity LED Rope Light Installation?
Your clients complain about ugly shadows in their bathroom mirrors. Bad lighting ruins expensive vanity designs. You lose future contracts…
