How to Cut, Connect, and Extend LED Strip Lights Properly for Reliable Installations
How to Cut, Connect, and Extend LED Strip Lights Properly for Reliable Installations
Cutting and extending LED strip lights looks simple until a bad joint causes voltage loss, intermittent failures, or a dark section that has to be reopened after the project is finished. In professional work, the connection method affects reliability as much as the strip specification itself. The goal is not just to make the strip turn on. The goal is to create a clean, durable, low-resistance connection that matches the environment and service expectations of the installation.
Cut Only at the Designed Cut Points
Every strip has designated cut marks tied to its circuit design. Cutting anywhere else can damage the segment and make reliable reconnection difficult or impossible. Before cutting, confirm:
- the exact cut interval for the product voltage and LED density
- polarity marking on the copper pads
- whether the sealed jacket must be reopened for access
- the minimum remaining pad area for soldering or connection
Use a clean, sharp tool and inspect the cut immediately. Torn copper pads and crushed board edges are common causes of later failure.
The Most Reliable Connection Method Is Still Soldering
For permanent commercial installations, soldering remains the best connection method because it creates a compact, conductive, mechanically stable joint. It is especially valuable where the strip must fit in narrow profiles or where vibration, thermal cycling, or outdoor exposure will challenge clip-style connectors.
A good soldered connection should include:
- correctly prepared pads
- wire gauge matched to current and installation space
- secure polarity identification
- strain relief so the solder joint is not carrying mechanical tension
- insulation or resealing appropriate to the environment
When Connectors Make Sense
Solderless connectors can be useful for fast prototyping, temporary mockups, or low-risk service situations. They may also help on sites where hot works are restricted. However, they should be chosen carefully.
Use connectors only when:
- they are compatible with the exact strip width and construction
- there is enough profile space for the connector body
- the environment is dry unless a true outdoor-rated connector system is used
- the installer accepts that long-term reliability may be lower than a properly soldered joint
In many professional installations, connectors are acceptable as a convenience tool but not the preferred permanent joint.
Outdoor Connections Must Be Resealed as a System
If a sealed outdoor strip is cut, the factory protection has been broken. Reconnection is only complete when the waterproofing is restored.
Common professional methods include:
- soldered leads with adhesive-lined heat shrink
- gasketed or gel-filled waterproof connectors
- compatible silicone sealing at end caps and cable exits
- protected splices located inside suitable enclosures or channels
The correct method depends on the strip design and the site condition, but the principle does not change: the joint must be sealed and mechanically protected to the same practical standard as the rest of the installation.
Extending Long Runs Requires Electrical Planning
A strip can be connected perfectly and still perform badly if it is extended beyond its practical feed length. Voltage drop causes dimming, color shift, and overheating, especially on higher-load runs.
When extending LED strips, review:
- maximum feed length from one end
- total wattage of the run
- cable gauge for feeder wires
- need for power injection at intervals
- driver capacity with headroom
- whether parallel feeds are better than one continuous chain
For longer architectural runs, 24V systems usually provide a cleaner solution than 12V because they reduce current and extend usable run length. Even so, power injection is often still required.
Connecting Without Bulky Clip Accessories
Where profile space is limited or a seamless finish is important, direct soldered wire links are usually better than clip-on joiners. Small jumper wires allow corners, small offsets, and transitions through cabinets, channels, or façade details without introducing large plastic connection bodies.
This approach is often the best answer when the question is how to reconnect a cut strip without bulky connectors. It keeps the assembly compact and usually improves long-term conductivity.
Test Before Final Closure
Before sealing channels, diffusers, or junction boxes, test the full run under load. Confirm:
- polarity is correct
- all segments illuminate evenly
- no joint overheats
- no visible flicker appears during dimming
- voltage at the far end remains within acceptable range
It is far cheaper to remake one suspect connection during installation than to reopen finished work later.
Conclusion
To cut, connect, and extend LED strip lights properly, work from the strip’s cut points, favor soldered joints for permanent installations, reseal outdoor connections completely, and plan power distribution before extending long runs. A professional strip-light system is built on sound electrical connections and realistic feed-length limits. When those basics are handled well, the installation looks cleaner, performs more consistently, and requires far less rework.
Recommended Products
Interested in Our LED Solutions?
Get professional consultation and customized LED lighting solutions for your projects. Contact our expert team today.
Related Articles
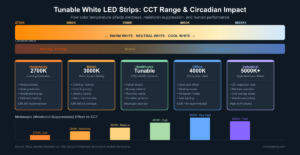
Tunable White LED Strips: The Complete Specification Guide for Architects and Lighting Designers
Tunable white LED strips blend warm and cool channels to produce dynamic CCT light. This guide covers dual-channel wiring, driver…

UGR and Glare Control in LED Strip Lighting: How to Specify for Visual Comfort in Commercial Spaces
UGR (Unified Glare Rating) is the most under-specified variable in commercial LED strip projects — yet it determines whether your…
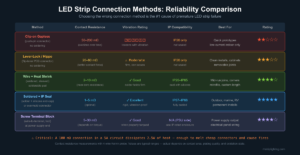
LED Strip Connectors and Soldering: Building Reliable Connections That Last
Connection failures are the #1 cause of LED strip callbacks. This guide compares clip connectors, lever-lock, and soldered joints by…