Why LED Strip Light Lumen Output Changes After Installation
One of the most frustrating moments in an LED strip project is when the sample looked bright enough, the specification looked correct, the order was placed, and the installed result still feels weaker than expected.
From our perspective, this is one of the most common reasons buyers lose confidence in a strip supplier, even when the strip itself may not be defective at all. The problem is that many people think lumen output is a fixed number that travels unchanged from the datasheet to the finished installation. In real projects, it does not work that way.
A strip can be technically correct, electrically sound, and still look noticeably dimmer after installation because the real light output people experience is shaped by more than the bare strip rating. Once the strip goes into an aluminium profile, behind a diffuser, inside a recess, under a shelf, above a glossy surface, or across a long run, the visible result changes.
That is why the real question is not only how many lumens per meter the strip is rated for. The better question is how much of that light survives the way the strip is actually installed and viewed.
The Datasheet Number Is Not the Installed Result

This is the first misunderstanding that creates trouble.
Many buyers treat the lumen figure on the datasheet as if it were the final on-site brightness. It is not. In most cases, that number describes the strip under controlled test conditions, not under the exact mounting, diffusion, reflection, and viewing conditions of the actual project.
From our side, this is where expectation gaps begin. A buyer sees 1200 lumens per meter on the specification and assumes that the installed line will look like 1200 lumens per meter in the finished space. But after installation, part of that light has already been lost, redirected, softened, blocked, or visually diluted.
That does not automatically mean the strip underperformed. It may simply mean the project team compared a laboratory-style product figure with a real architectural result.
We usually tell buyers this: the datasheet tells you what the strip can produce, but the installation decides what the space actually receives. If those two are treated as the same thing, disappointment is very easy to create.
Diffusers and Profiles Often Take More Light Than Buyers Expect

This is one of the most common reasons installed output feels lower than expected.
Diffusers improve visual quality. They soften hotspots, hide LED dots, and make the line look more premium. But they also reduce raw visible output. That is normal.
Depending on the profile and diffuser type, the installed result may lose a meaningful percentage of the light the bare strip produced in open air. Frosted covers, deeper channels, thicker diffusion materials, and more concealed mounting positions can all make the final result feel softer or dimmer.
From our perspective, this is not a defect. It is a tradeoff. The problem begins when the tradeoff is never explained early enough.
Buyers often want both of these at once:
- perfect diffusion with no visible dots
- the same brightness as the open strip sample
In many cases, you cannot have both at the same level without changing the strip density, the power, or the installation geometry. A smoother line usually costs some direct output.
That is why projects that prioritize visual finish should not compare channel-installed brightness with bare-strip sample brightness as if they were equivalent. If the diffuser is part of the design, the diffuser is part of the lumen calculation too.
Distance, Setback, and Surface Reflectance Quietly Change the Result

A strip does not look equally bright in every physical situation, even if the strip itself does not change.
This is where a lot of buyers feel that the lumen number was misleading, when in reality the installation condition changed the visual outcome.
Three project variables matter a lot here:
1. Distance from the lit surface
The farther the strip is from the surface it is meant to illuminate, the more the light spreads and the lower the apparent intensity becomes at the target area.
2. Setback inside a profile or recess
A strip buried deeper inside a slot or cove may look cleaner, but more of the light is trapped, softened, or redirected before it reaches the visible field.
3. Surface reflectance
A matte black shelf, dark timber wall, or low-reflectance finish will absorb much more light than white paint, pale laminate, or glossy surfaces. The same strip can therefore feel dramatically weaker in one installation and quite strong in another.
From our side, this is one of the most important insight points in strip projects: light output is not only a product property, it is also a geometry-and-material result.
That is why the same strip can be “perfect” in one mock-up and “underwhelming” in another. The buyer may think the strip changed. Often, the environment changed the strip more than the strip changed itself.
Long Runs and Voltage Drop Can Make One End of the Installation Look Worse Than the Other

This is where the problem becomes even more painful, because now the strip does not just look dimmer than expected. It also looks inconsistent.
On longer runs, voltage drop can reduce output toward the far end of the strip. The result is not only lower brightness, but uneven brightness across the actual installation. That is one of the fastest ways to make a strip project look cheap, even when the strip product itself is decent.
We see this especially in:
- under-cabinet runs
- retail shelving
- long office joinery lines
- hospitality cove lighting
- architectural linear accents with continuous spans
From our perspective, this is one of the most common “the sample was fine but the installation is not” situations. The sample was short. The real project was long. The sample had no voltage-drop issue. The installation does.
That is why installers and buyers should ask before ordering:
- what is the maximum recommended run length for this strip?
- what voltage is being used, 12V or 24V?
- where are the feed points placed?
- does this application need parallel feeding instead of one long continuous run?
If those questions are ignored, the project may still turn on correctly, but the brightness consistency may already be lost before the client ever sees the finished line.
If you want to understand this installation mistake more deeply, this pairs naturally with a future topic like single-run versus parallel-run planning, because many “mysterious brightness problems” are actually wiring-layout decisions in disguise.
Perceived Brightness and Measured Lumens Are Not the Same Experience

This is where the conversation usually gets more complicated, but also more useful.
Even if measured lumens stay within expectation, the installation can still feel dimmer than the buyer expected. That is because people do not experience light only through instrument readings. They experience it through contrast, context, surrounding finishes, and what the light is being asked to do.
For example:
- a strip under a dark walnut shelf may feel weak even if the raw output is high
- a strip washing a pale satin wall may feel brighter than the same strip inside a darker recess
- a retail display with strong competing ambient light may make the shelf strip seem underpowered
- a strip used for task lighting will be judged more harshly than the same strip used for decorative accent
From our side, this is one of the most overlooked causes of frustration. Buyers often think they are purchasing lumens. In reality, they are purchasing a lighting result. Those are related, but not identical.
That is why a strip that is "bright enough" in a sample tray may still feel visually weak in the real commercial environment where the contrast conditions are different and the expectation is tied to actual product presentation or task visibility.
Bad Mock-Ups Create Expensive Confidence

One of the biggest project mistakes is trusting a mock-up that does not resemble the real installation.
We see this often. The strip is tested:
- in open air
- against a white sample board
- with no diffuser
- over a short run
- at ideal power conditions
- without the actual material finishes nearby
Then the same strip is installed:
- inside a channel
- behind a diffuser
- in a darker material environment
- across a longer run
- next to competing ambient light
- in a position with deeper setback or lower reflectance
And everyone acts surprised that it looks different.
From our perspective, that kind of mock-up does not reduce project risk. It creates expensive confidence.
A good mock-up should test the strip in conditions that are as close as possible to the final application:
- real profile
- real diffuser
- real material finish
- real mounting depth
- realistic run length
- realistic viewing distance
- realistic ambient light level
If the mock-up is unrealistic, the approval is also unrealistic. And once the installation is complete, the client will judge the built result, not the sample table.
What Buyers Should Check Before Trusting a Lumen Number
Before treating lumen output as a buying decision, we recommend checking these points:
LED Strip Lumen Output Reality Checklist
- Is the lumen figure measured for the bare strip or the installed system?
- Will the strip sit behind a diffuser or inside a profile?
- What light loss should be expected from the chosen profile and cover?
- How far is the strip from the target surface?
- What colour and reflectance does that surface have?
- Is the run length long enough for voltage drop to matter?
- Are multiple feed points needed?
- Is the project judging decorative ambience or task visibility?
- Was the mock-up done under realistic installation conditions?
If those questions are not answered, the lumen number may still be technically correct, but commercially misleading.
FAQ
Why does my LED strip look dimmer after installation?
Common reasons include diffuser loss, deeper setback in the profile, greater distance from the target surface, darker surrounding finishes, voltage drop on long runs, and unrealistic expectations created by open-air samples.
Do diffusers reduce LED strip brightness?
Yes. In most cases, they reduce visible output to some degree. That is normal. The tradeoff is better uniformity, lower glare, and a more premium visual finish.
Can the same strip look different in two installations?
Yes. The same strip can appear much stronger or weaker depending on mounting depth, surface reflectance, ambient light, run length, and viewing angle.
Is the datasheet lumen number wrong if the installed result looks dimmer?
Not necessarily. The datasheet usually describes the strip under standard test conditions. The installed result depends on many additional project variables that may reduce or alter the visible output.
How do I avoid lumen disappointment in a project?
Use realistic mock-ups, confirm diffuser and profile losses, check run-length planning and voltage drop, and evaluate the strip in the actual materials and geometry of the installation.
Final Thoughts
Most LED strip brightness disappointments do not come from fraudulent numbers. They come from comparing a bare-strip specification with a real-world installation that changes how the light behaves.
From our perspective, that is why lumen output should never be treated as a fixed promise detached from profile, diffuser, distance, material, and wiring layout. The strip does not enter the project alone. It enters a system, and that system decides how much of the light people actually experience.
If you want to compare strip options for a real application, send us the run length, profile type, diffuser choice, mounting distance, and surface finish, and we can help you judge which output level makes sense before the project is installed and the expectation gap becomes expensive.
Footnotes
Recommended Products
Interested in Our LED Solutions?
Get professional consultation and customized LED lighting solutions for your projects. Contact our expert team today.
Related Articles
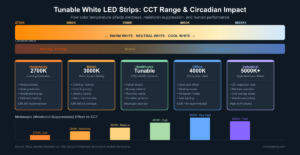
Tunable White LED Strips: The Complete Specification Guide for Architects and Lighting Designers
Tunable white LED strips blend warm and cool channels to produce dynamic CCT light. This guide covers dual-channel wiring, driver…
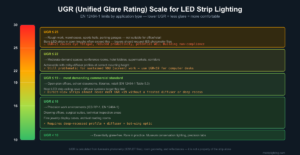
UGR and Glare Control in LED Strip Lighting: How to Specify for Visual Comfort in Commercial Spaces
UGR (Unified Glare Rating) is the most under-specified variable in commercial LED strip projects — yet it determines whether your…
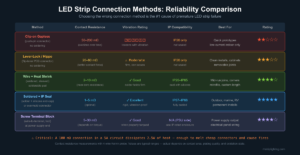
LED Strip Connectors and Soldering: Building Reliable Connections That Last
Connection failures are the #1 cause of LED strip callbacks. This guide compares clip connectors, lever-lock, and soldered joints by…